
Round2 Models has kept the Star Trek model kit license alive since 2008, when owner Thomas Lowe purchased the rights to the original AMT brand that had controlled the Trek license going back to the production of the original series Enterprise kit—for many years the biggest selling model kit of all time—in 1967. R2 has not only continued to produce new models from the franchise but has kept many of the original AMT kits in circulation, repackaging them and reissuing them periodically so that nostalgic older modelers can do a better job building them than they did when they were 10.
R2 created a buzz a few years ago when they unveiled an illustration of what some of the starships from CBS All Access’ series Star Trek Discovery would look like if released at different scales: 1/2500 (which puts the original Enterprise at around 4” long), 1/1000 (which makes the Enterprise just under a foot long), and 1/1400 (which would put the Enterprise at 9”).
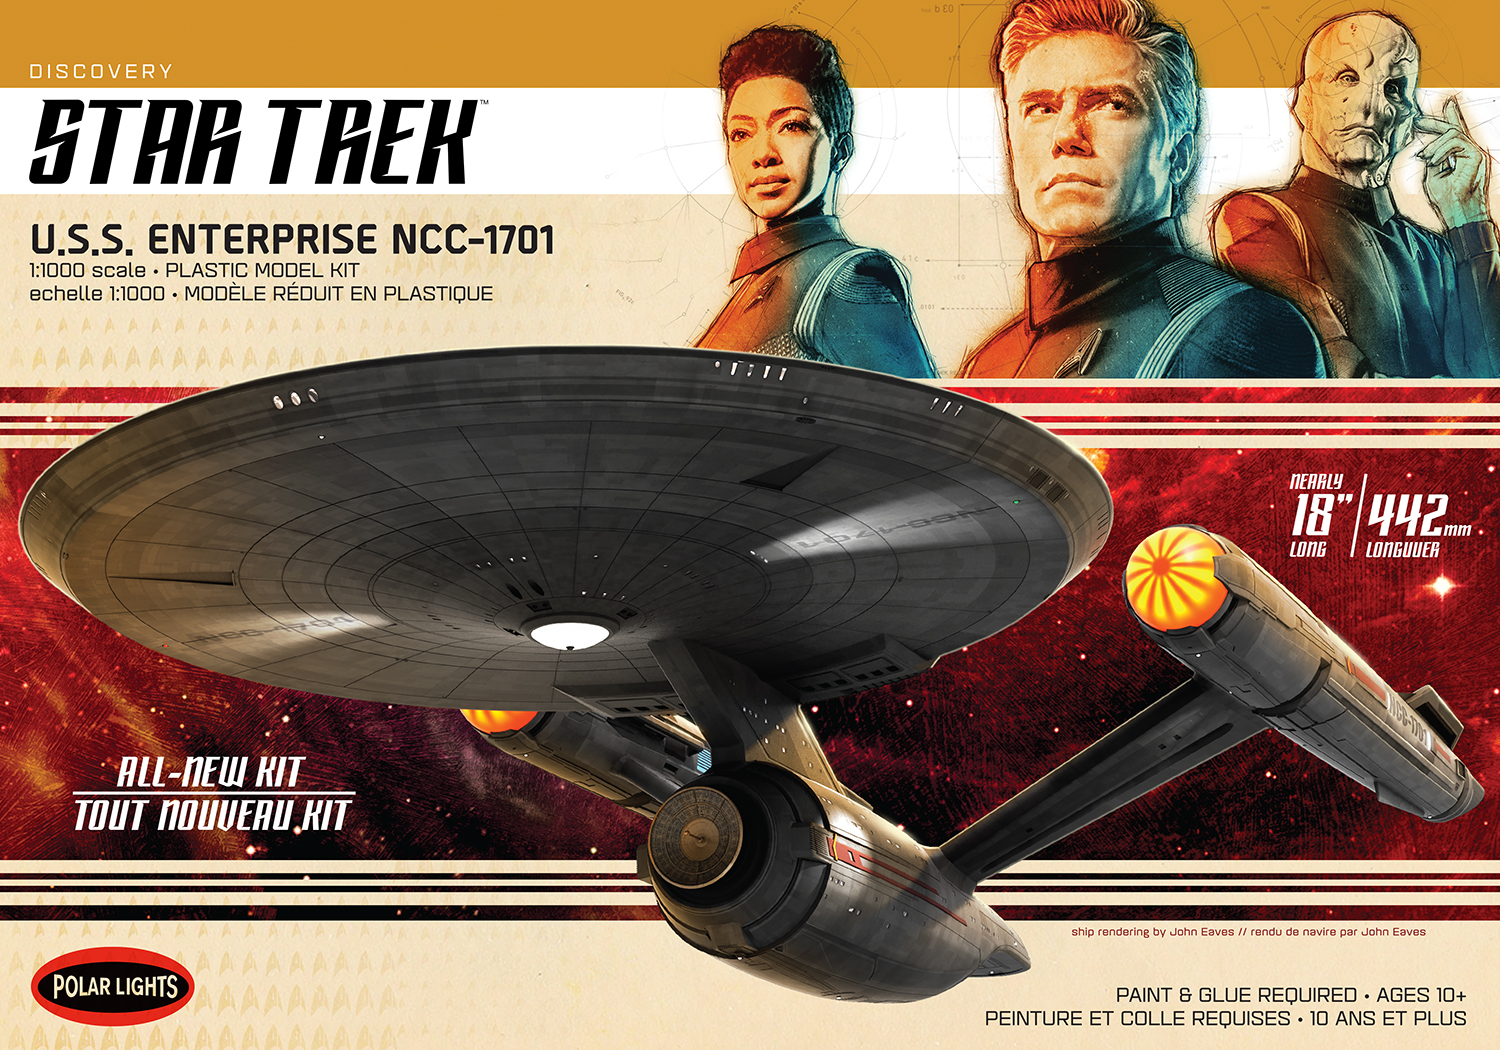
Box art for Round2 Polar Lights Star Trek: Discovery USS Enterprise
The kit
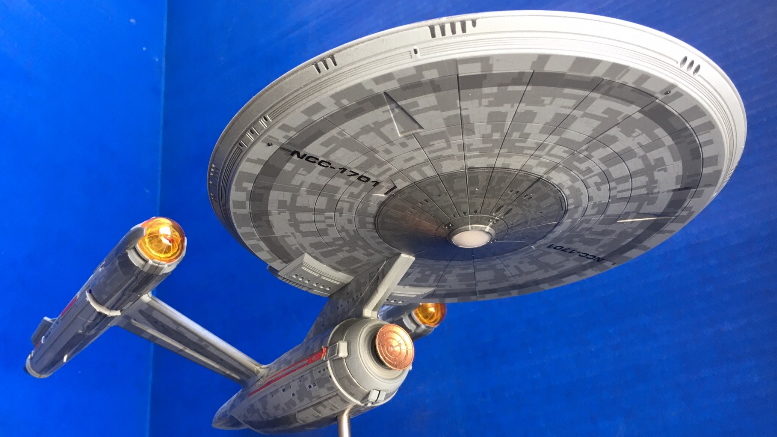
At 1/1000 the Discovery would be a whopping 28” in length, but the show by then had introduced Captain Christopher Pike as a character and depicted his Enterprise as a larger, showier version of what we saw in the original series. Despite its increase in size, at 1/1000 the Polar Lights Disco Enterprise came in at a quite manageable 18.9” long—around the size of the original, 1967 AMT Enterprise model.
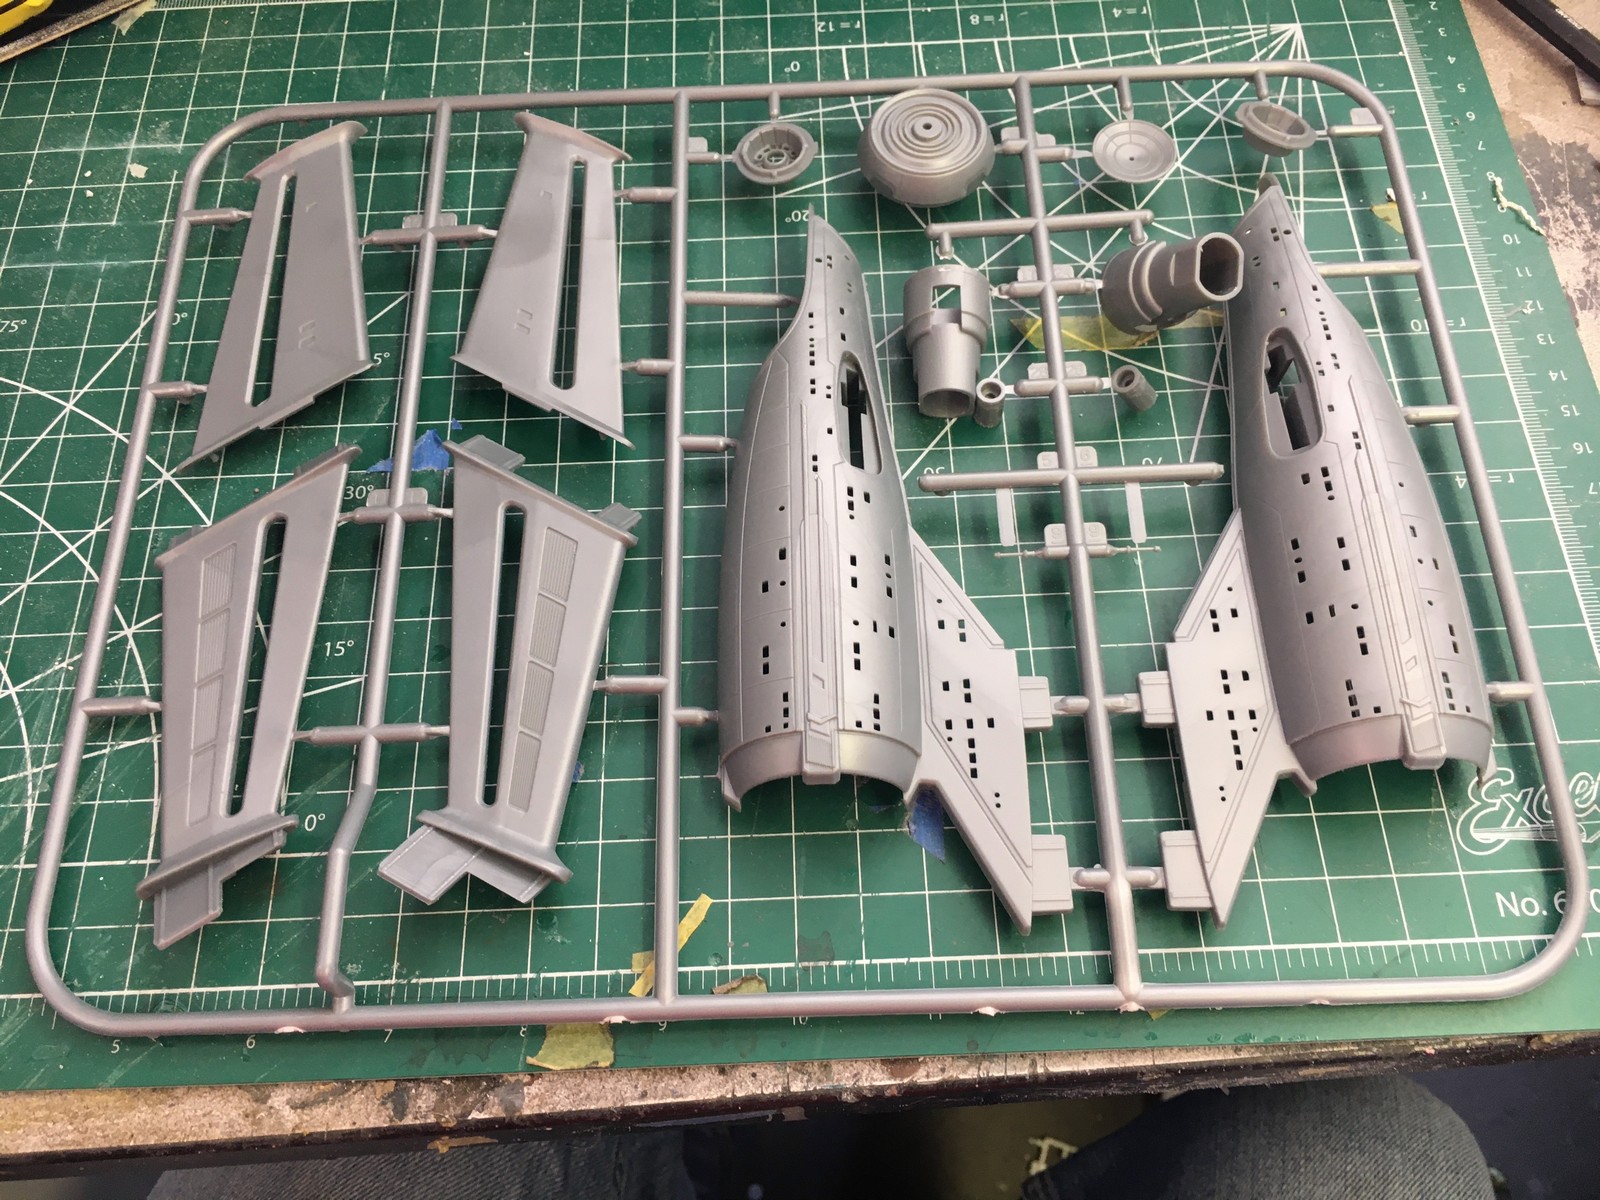
Engineering hull parts
Round2 has released models of the USS Discovery, Captain Georgiou’s ship the USS Shenzou, and Pike’s Enterprise in relatively small 1/2500 versions but the popularity of Pike and the prospect of a new show set on Pike’s Enterprise has inspired the release of a nice 1/1000 Polar Lights model, along with a lighting accessory add-on kit and a separate set of Aztec decals.
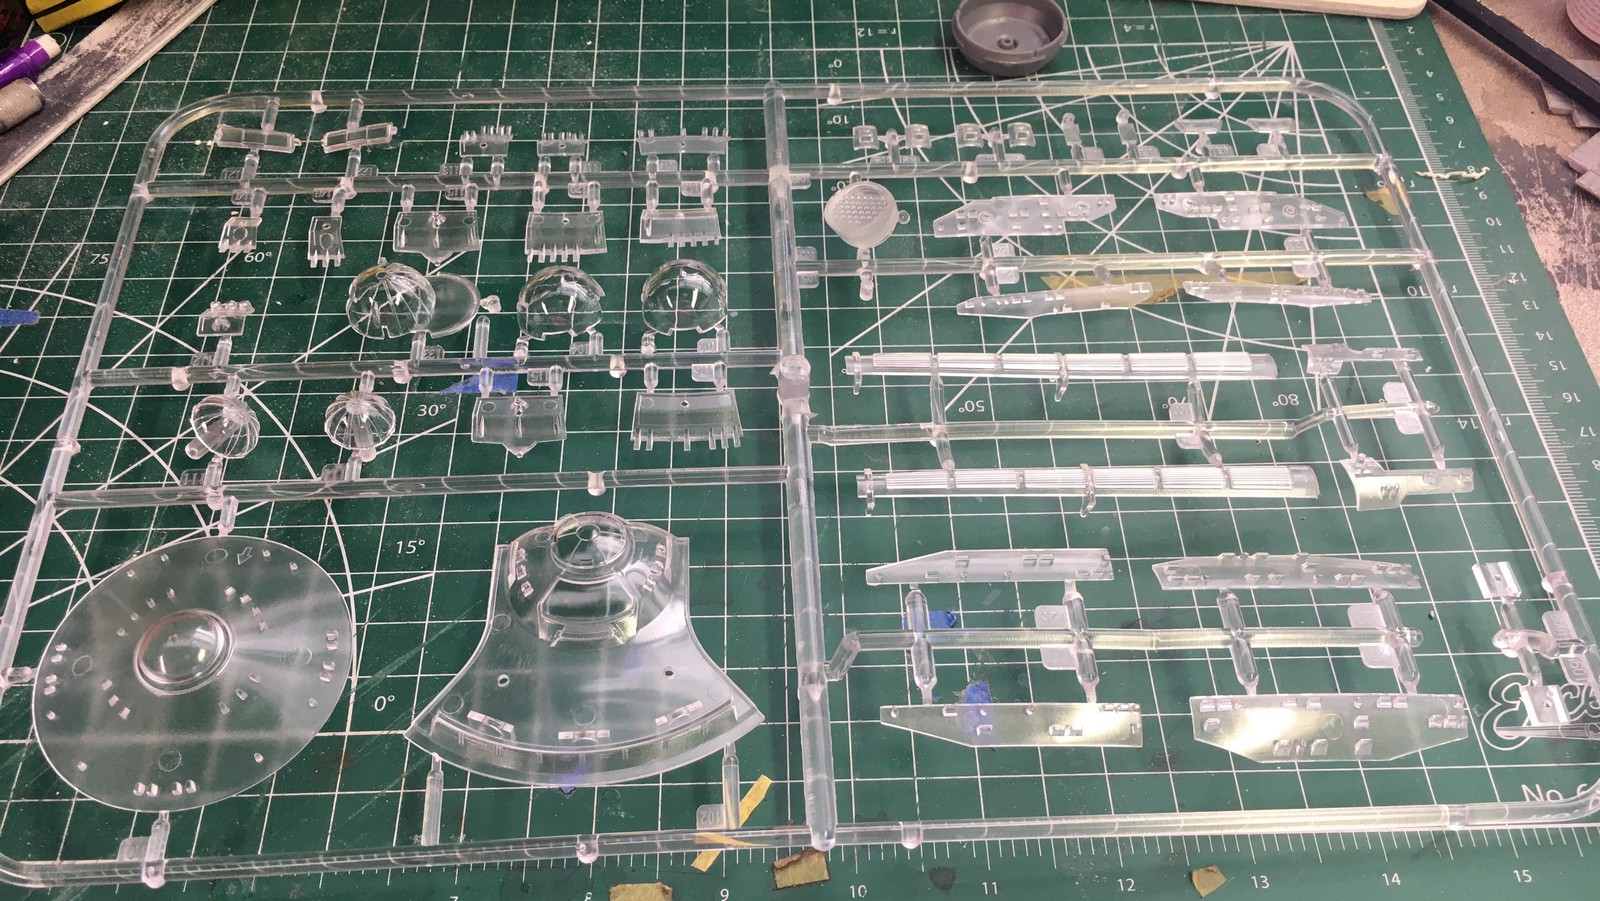
LOTS of clear parts…
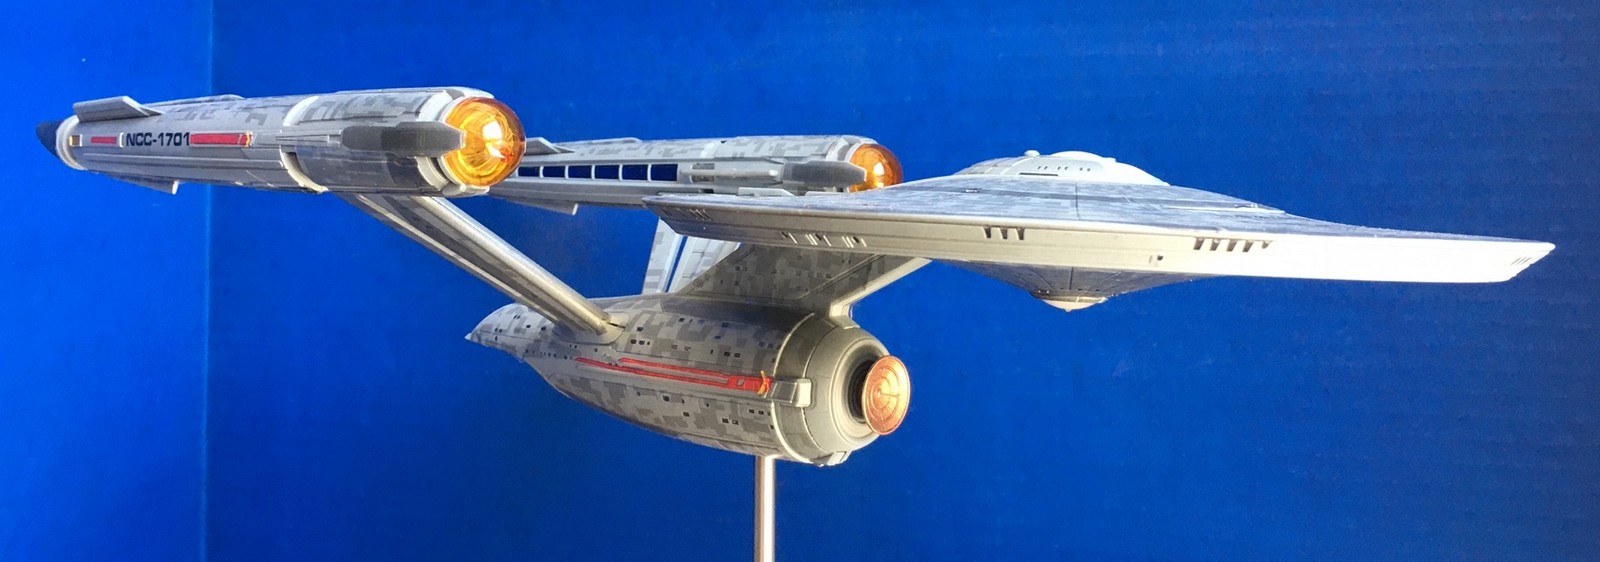
The model itself boasts 75 parts, which includes a LOT of clear window pieces as well as clear pieces for the forward warp engine domes, rear-engine caps, and inner warp engine grills. The design itself is a neat modernization of the original Matt Jefferies Enterprise that preserves many of the original ship’s details while making some of its familiar lines a little sleeker. Originally the design would have looked even closer to the Jefferies Enterprise with right-angled, “straight” warp engine pylons, but ultimately the pylons were swept back and shaped similar to the “refit” Enterprise first seen in Star Trek: The Motion Picture.
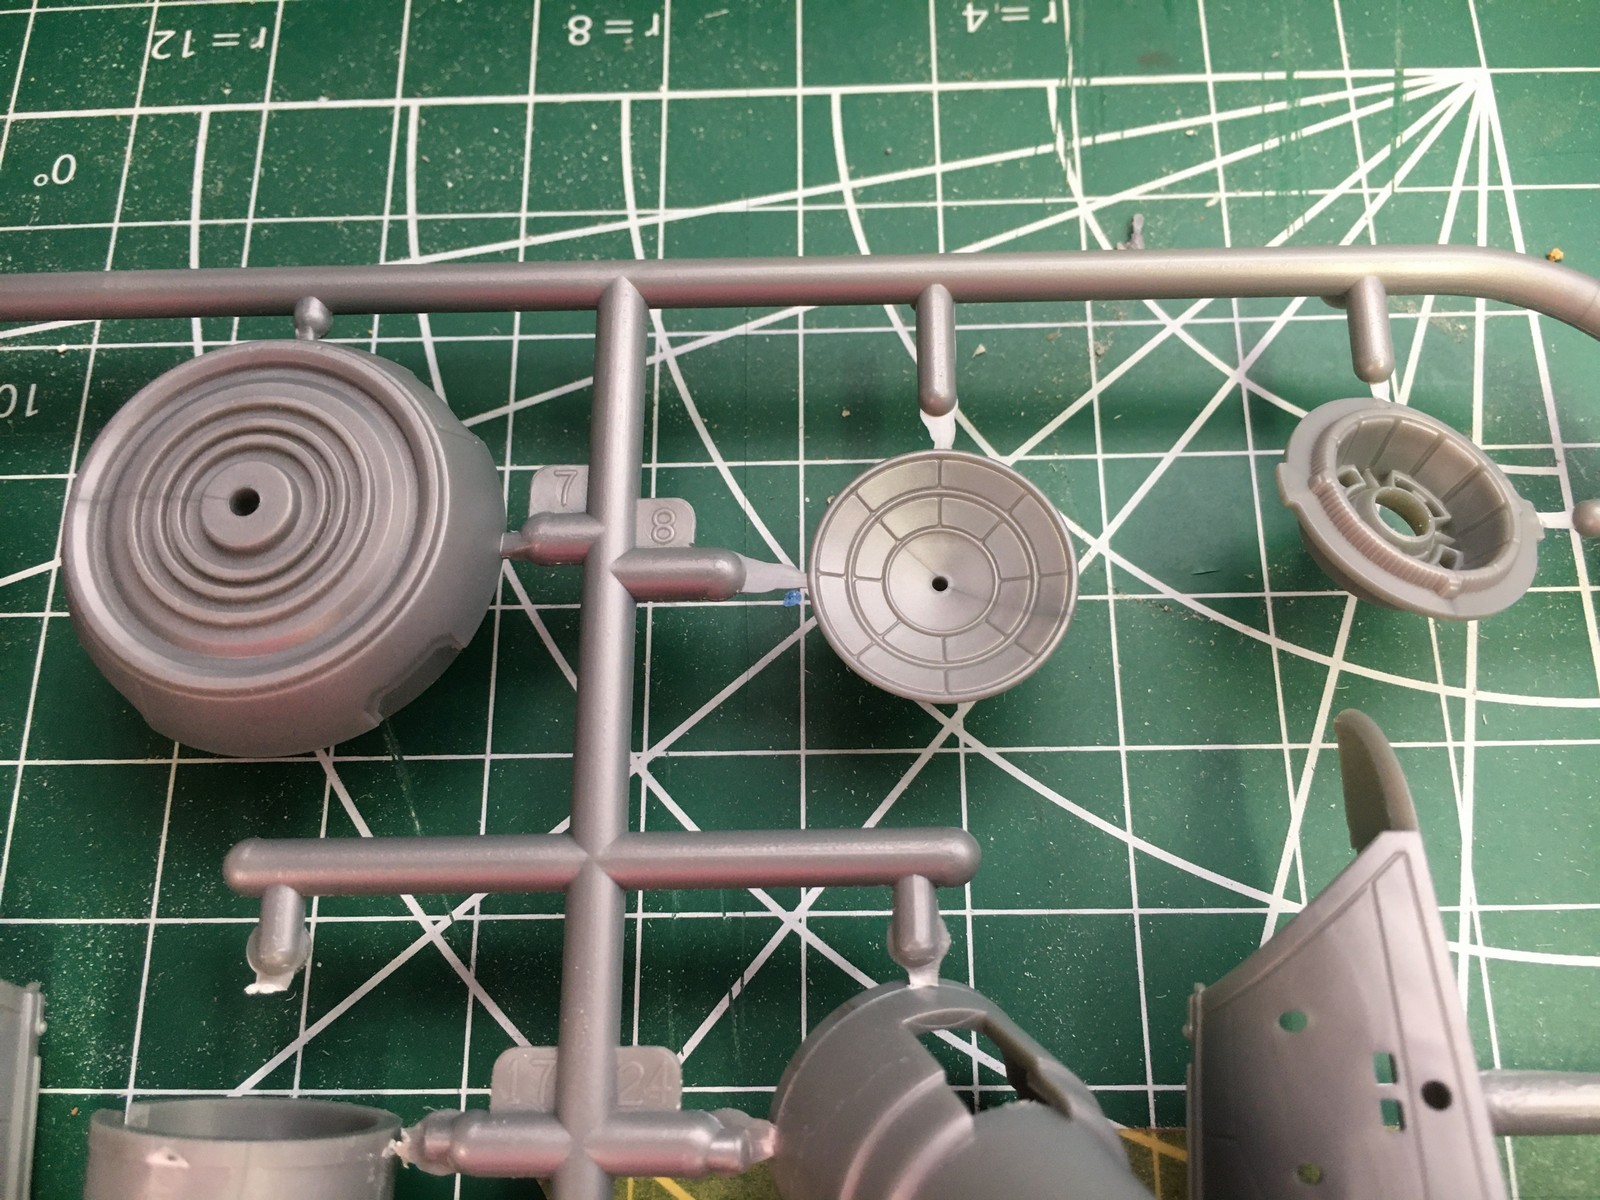
Deflector parts–the dish detail is enhanced a bit by the Aztec decals
The engines are designed to look a bit more related to those of the NX-01, which is a neat touch, although of course, this messes with the canon we all know and love. We’ve seen, for example, Sisko and the gang on board the original NCC-1701 design in DS9’s “Trials and Tribble-ations” and even Star Trek Enterprise incorporated the Jefferies Enterprise design into its Mirror universe episodes as the Defiant—so is Discovery set in an alternate timeline? Or is it just a TV show and not actual future history? The debate rages on…
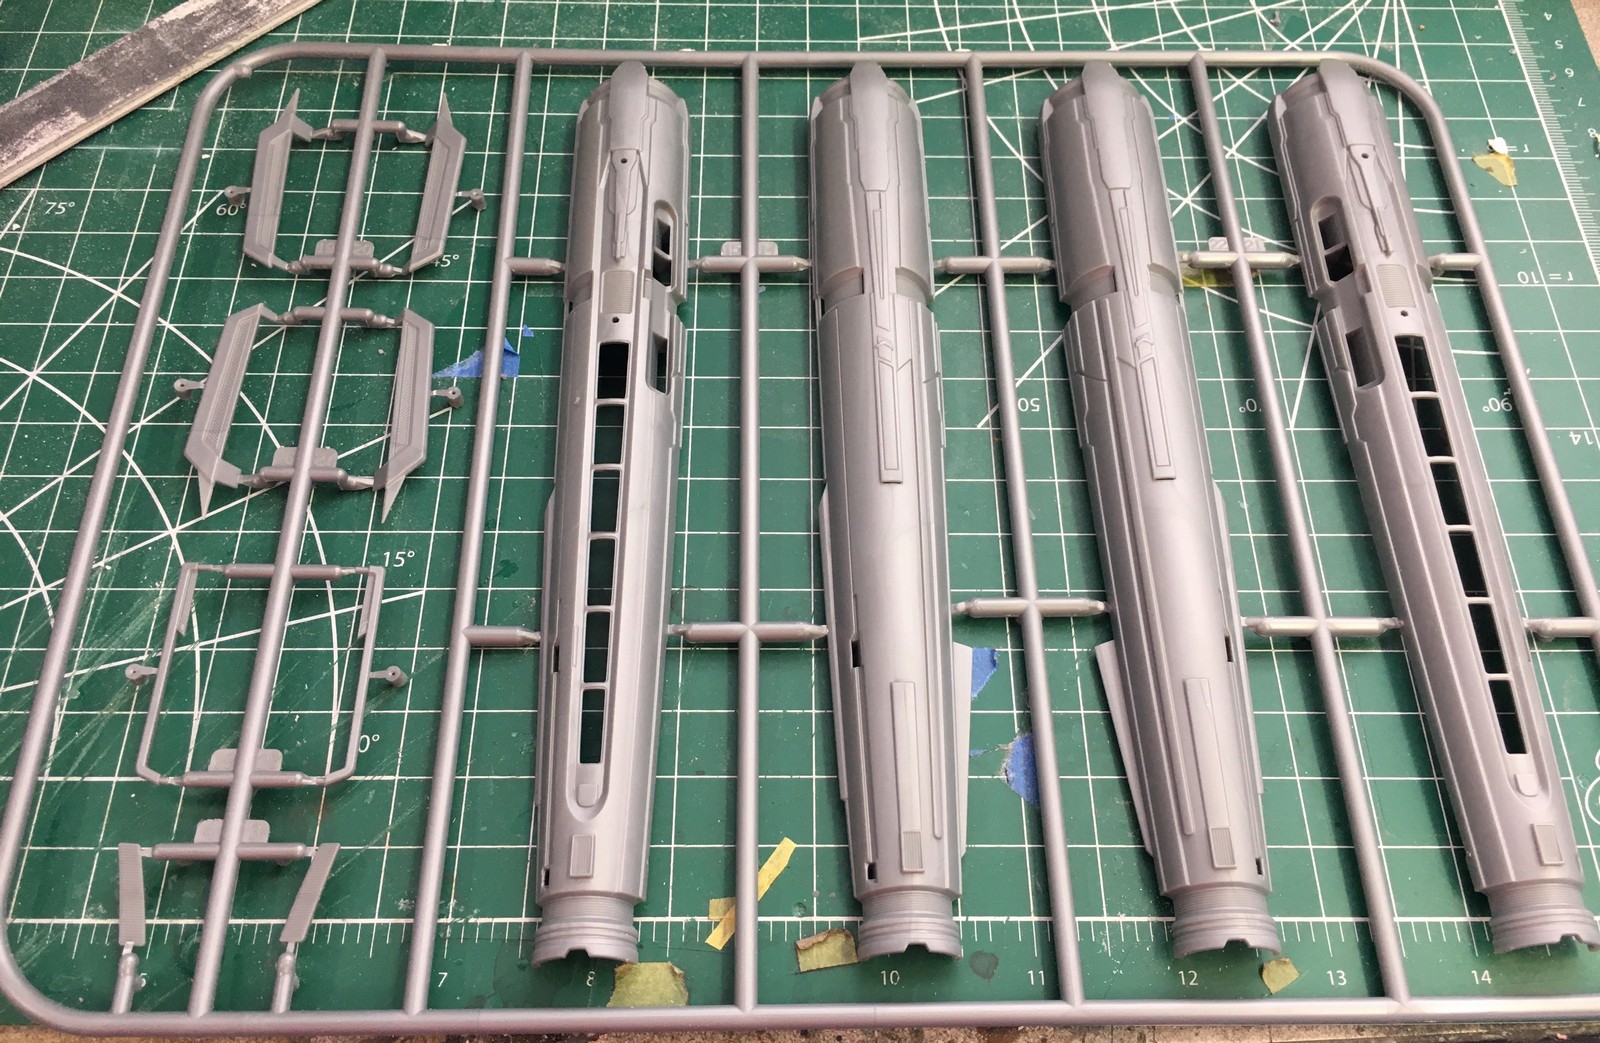
Warp engine parts

Warp engine domes and the strangely clear shuttlebay doors…
The build
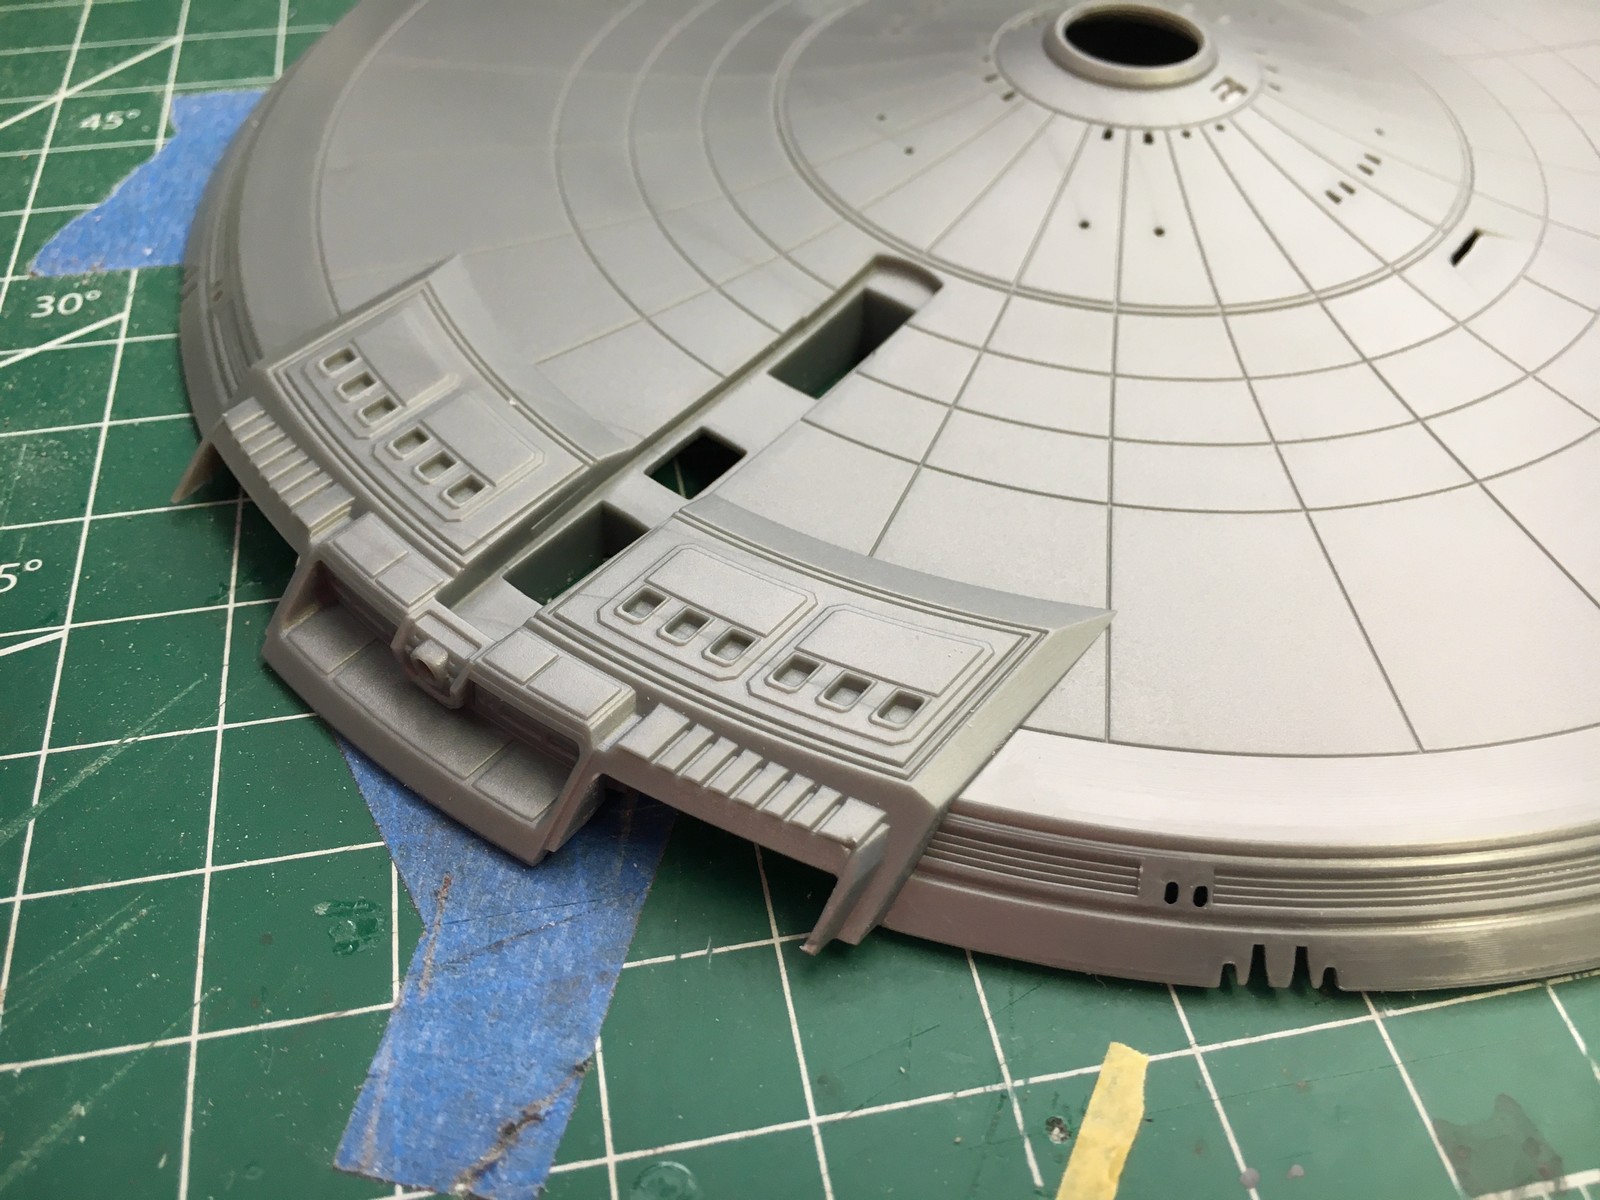
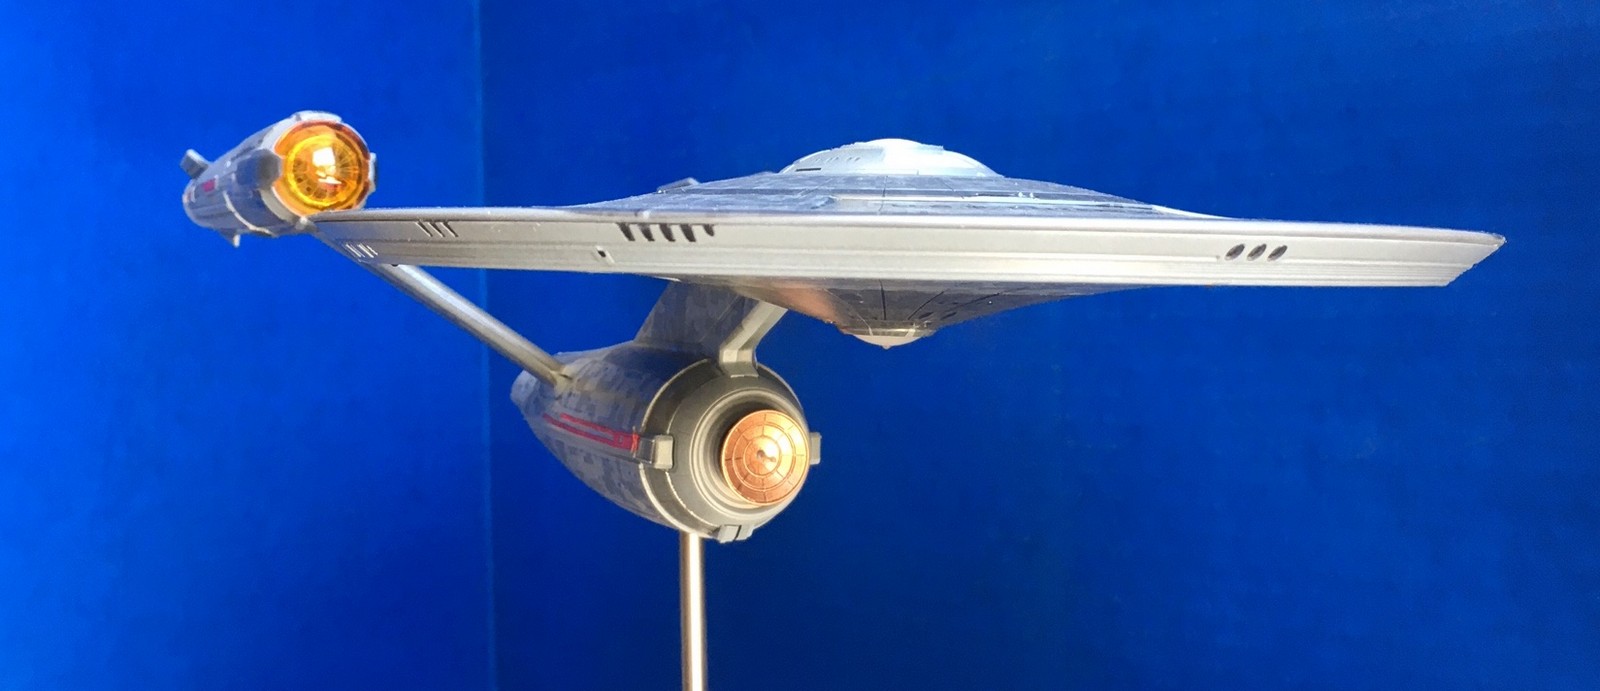
The basic Enterprise kit is terrific—a great, manageable size and a super easy build, although you will spend a lot of time putting in little clear window pieces. In the era of computer-based starship design, daunting levels of detail are possible, but the model retains the basic, smooth look of the original ship for the most part. I only found one notable inaccuracy, which is the area in front of the bridge, depicted in the kit by a large, clear, convex shape while the actual area seems to be more of a convex scoop with some lighting areas built into it. This would not be an easy fix for the average modeler but I can see a simple aftermarket or 3D printed part being produced for it that would still allow for lighting.
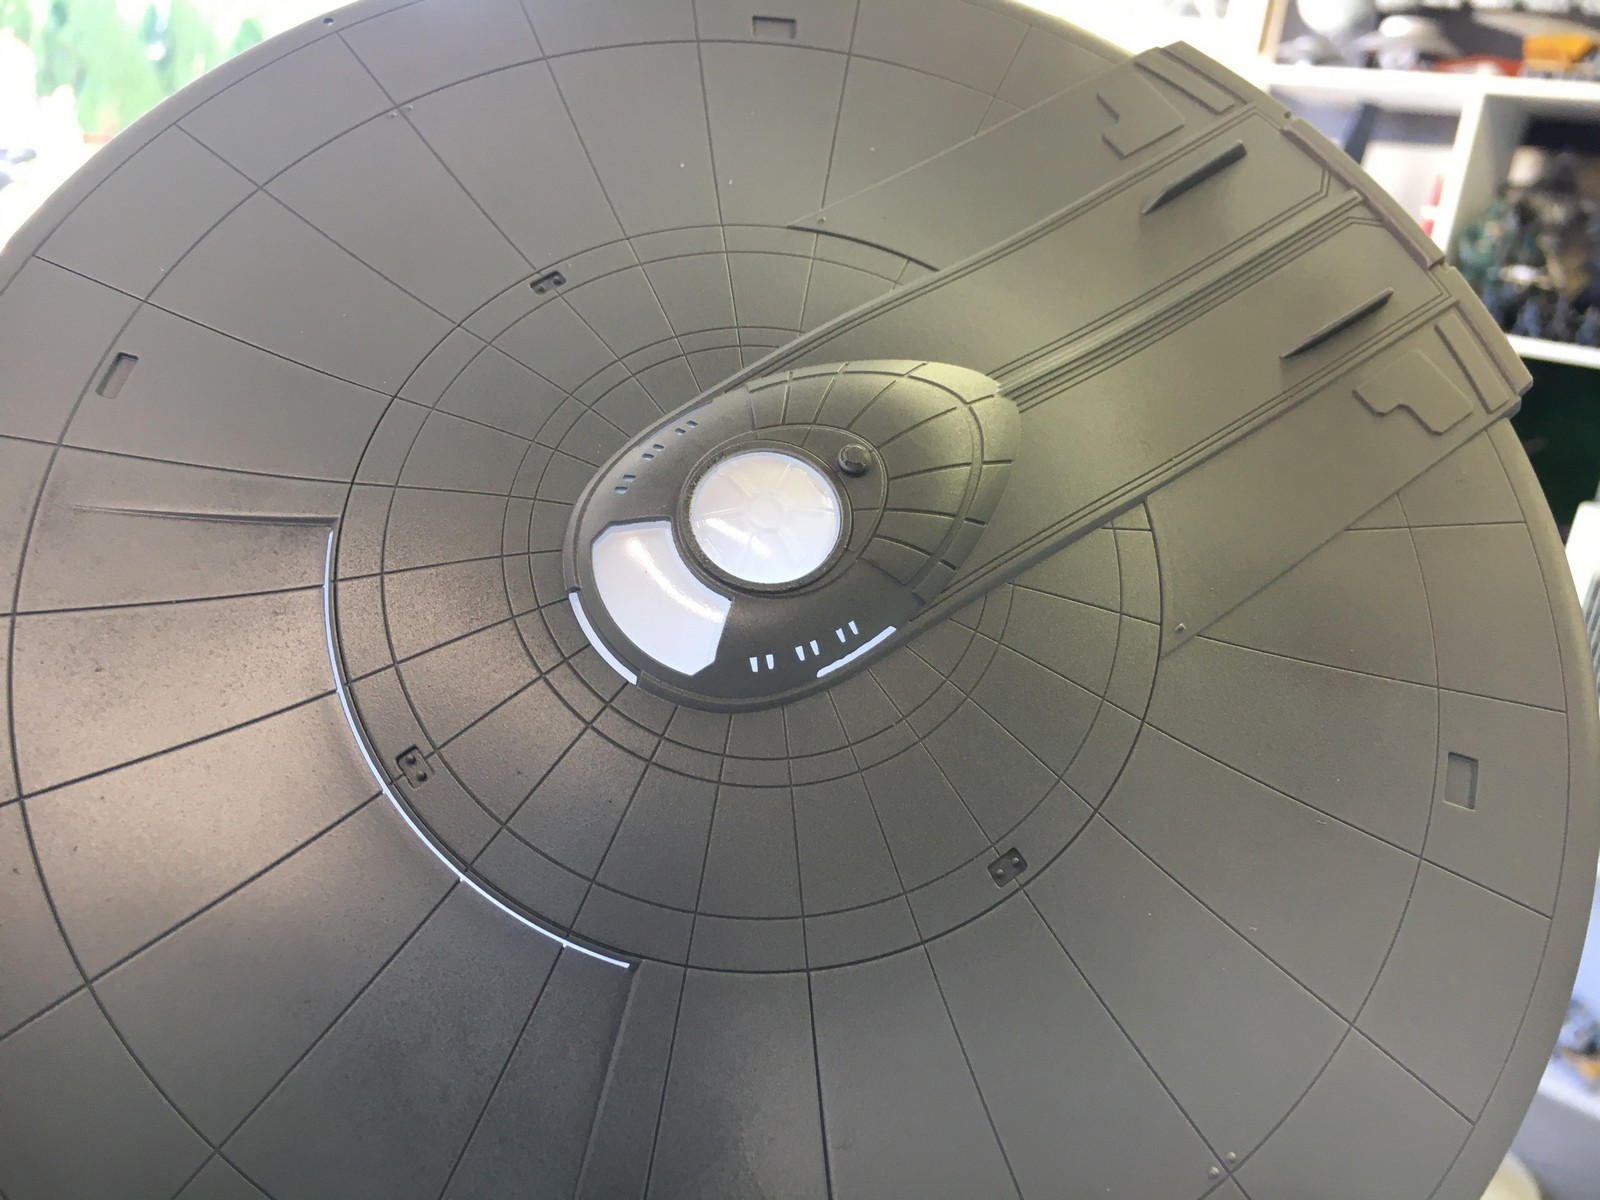
Upper primary hull with clear parts installed
The legacy of the Enterprise kits, in general, has been an ongoing struggle to avoid “nacelle droop”—the tendency of the joints connecting the warp engine pylons to the secondary hull to be weak and poorly engineered, with the weight of the warp nacelles causing them to droop or misalign. This situation has gradually improved over the years and while early prototype photos of the kit displayed some droop, the engineering of the actual kit is superb with very strong, locking connections for the nacelle-to-pylon, pylon-to-secondary-hull and the secondary hull neck connection to the main disc so that the kit assembles superbly with the warp engines straight and secure.
So THAT’S where the photon torpedoes come out!
Round2 has made a lighting kit available for the Enterprise that costs about the same as the model itself. The lighting kit (not incorporated into our build) consists of a number of prewired LEDs that plug into a circuit board that is set inside the secondary hull of the model, as well as colored clear plastic parts to replace some of the model’s clear parts. There are clear red nacelle domes for the front of the warp engines, red impulse engine vents, clear blue engine grills, end caps, and a couple of other small clear parts for the warp engine lighting. The kit also provides two small motors that turn two inner clear domes with “fan blade” details molded into them included in the model kit in order to reproduce the familiar “spinning” warp energy effect at the front of the nacelles. One odd ramification of the lighting kit is that the Enterprise shuttlebay doors and the U-shaped deck extension behind them is molded in clear, which will create a light-blocking challenge since there’s an LED positioned directly behind the doors—apparently the reason is so that light can be transmitted into the deck piece and, if masked properly, give you a little lit-up shuttlecraft landing strip.

Nemo-esque, retro styling on the rear of the warp nacelles

Warp end caps–a challenge to paint if you’re going to light the kit
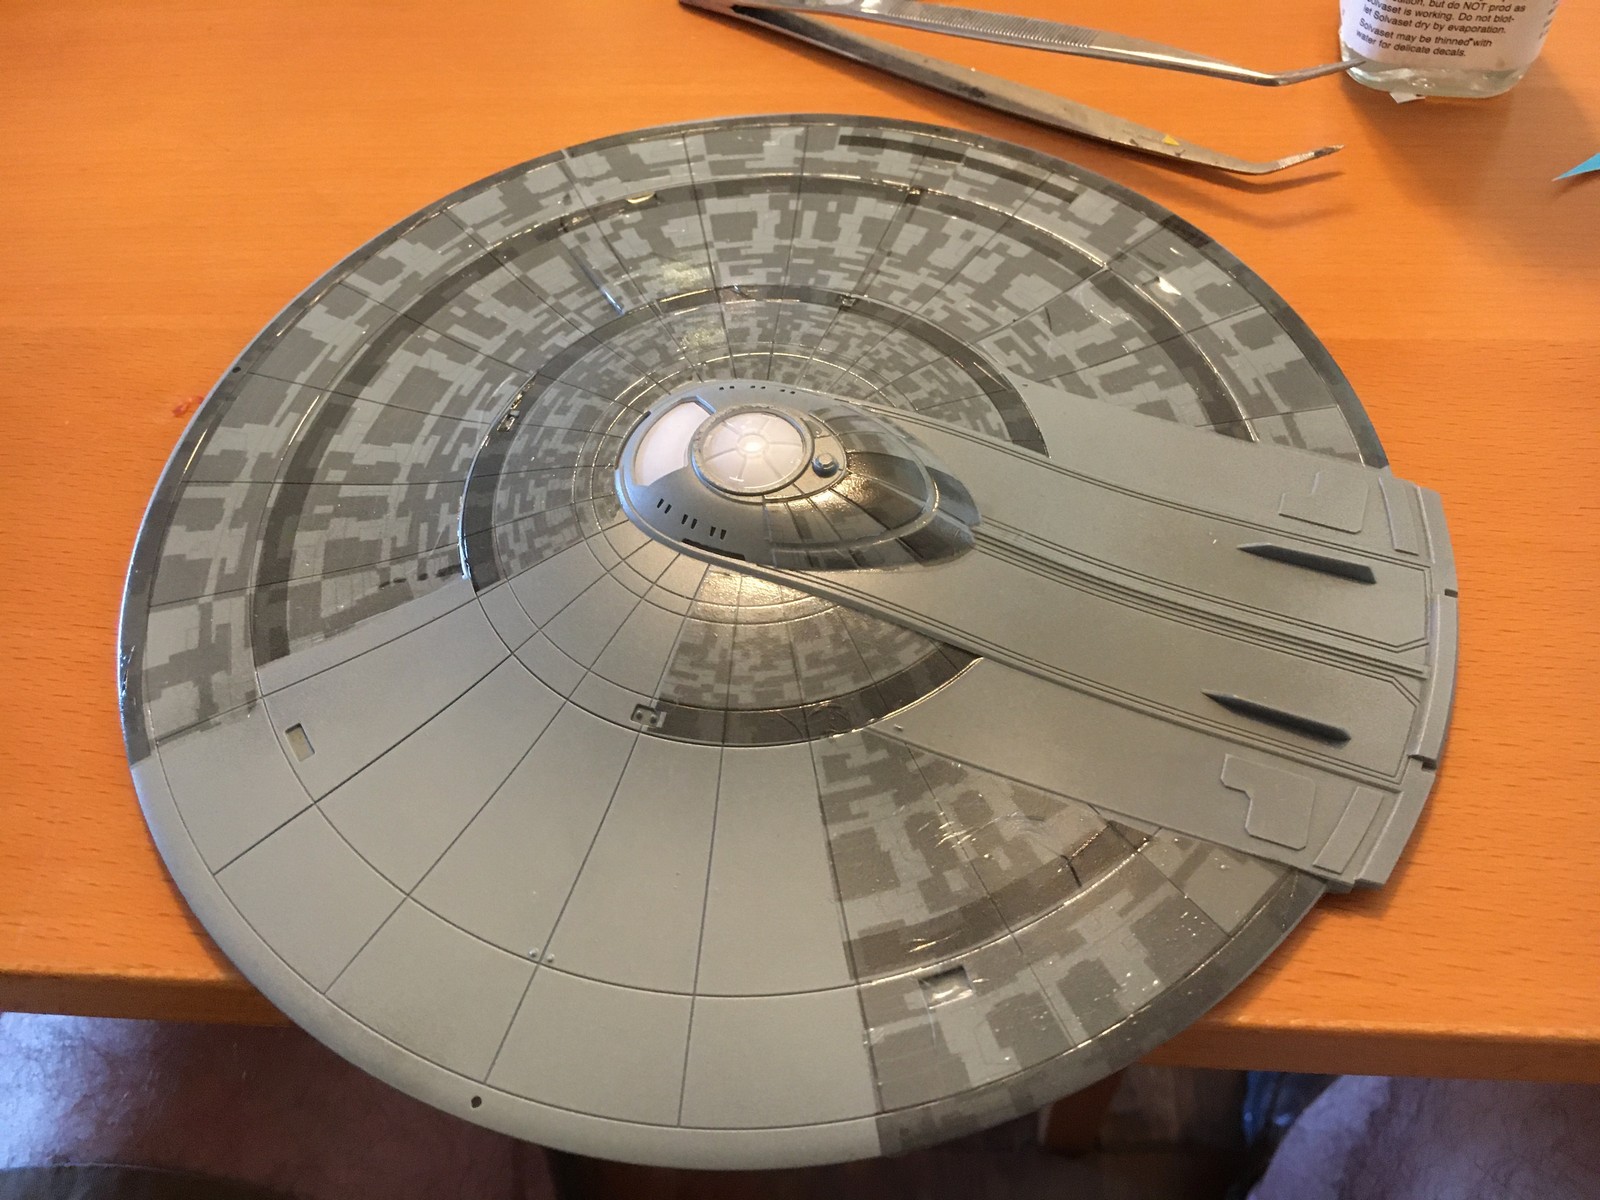
One artifact from the age of computer-generated visual effects design where Star Trek is concerned is the era of super elaborate Aztec paint schemes and the resultant headaches for modelers. The Aztec paint job on the 1979 Enterprise refit seen in Star Trek: The Motion Picture was done to add visual interest to the ship so it would hold up on the big screen, and this design aesthetic became a familiar one on subsequent Federation starship designs—but those were depicted by quite large models (the movie Enterprise miniature was 8 feet in length) that gave Hollywood model makers a pretty big canvas to paint on. Now with starships mainly rendered as CG models, the paint schemes are even more elaborate (artists can duplicate an elaborate Aztec pattern with a keystroke as opposed to painstakingly painting section after section on a model). While aftermarket adhesive paint masks are sold for a number of starship model kits so that Aztec patterns can be painted on, Round2 has offered a number of elaborate Aztec decal sheets for their models, normally sold separately to give the modeler a choice to either paint or use decals to recreate this unique look.
Upper primary hull with clear parts installed
Is it actually any easier to apply decals to the entire surface of a model than it is to mask and paint an Aztec scheme like this? It’s debatable. Round2’s decals are quite good and they do contain a level of detail and subtlety in variations of Aztec panels that would take you forever to paint, but decals can’t quite produce the iridescent effects and variations in reflectivity that you can get with paint. If you’re going to use the decals, you need to paint the surface of the model and make sure you have at least a semi-gloss (if not glossy) surface to apply the decals over. Always wet the surface of the model and use a setting solution like Solva-Set to make decals lay flat over details. The downside of using the decals is that they do cover up some fine surface detail on the kit, although the decals also do set into much of the detailing fairly well.
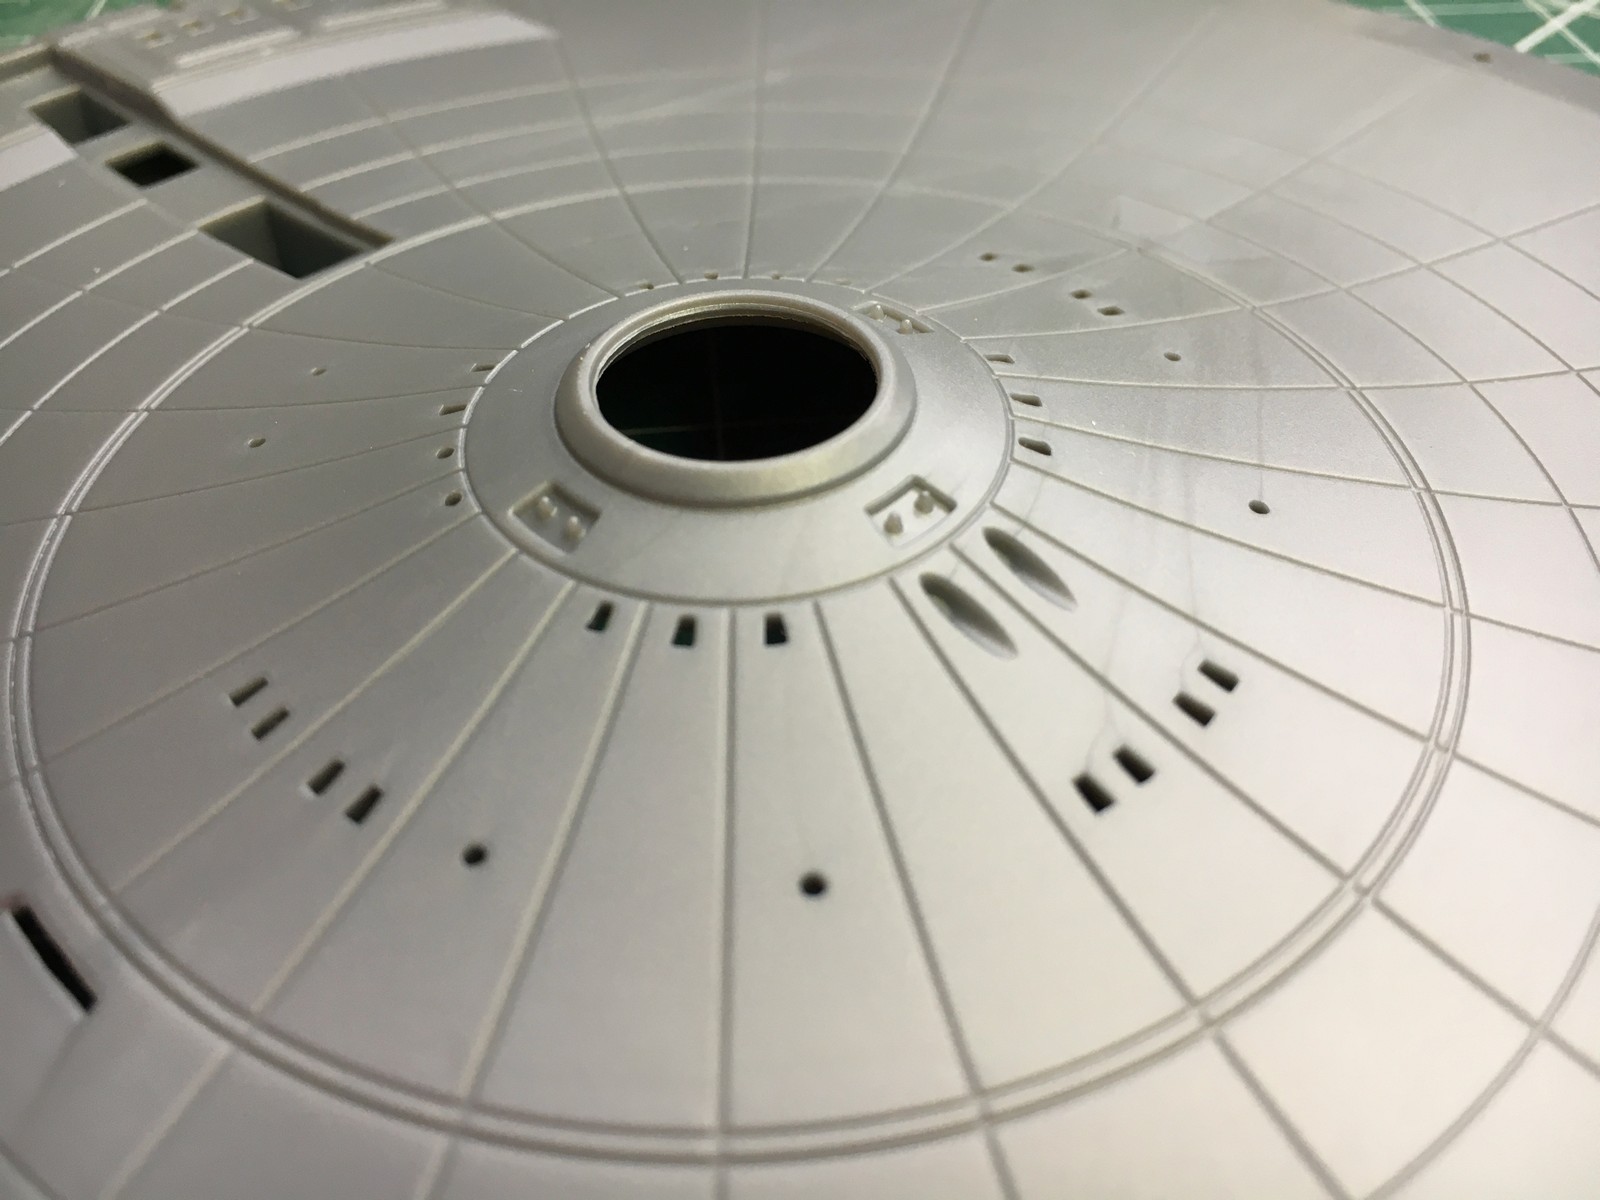
Underneath the impulse deck
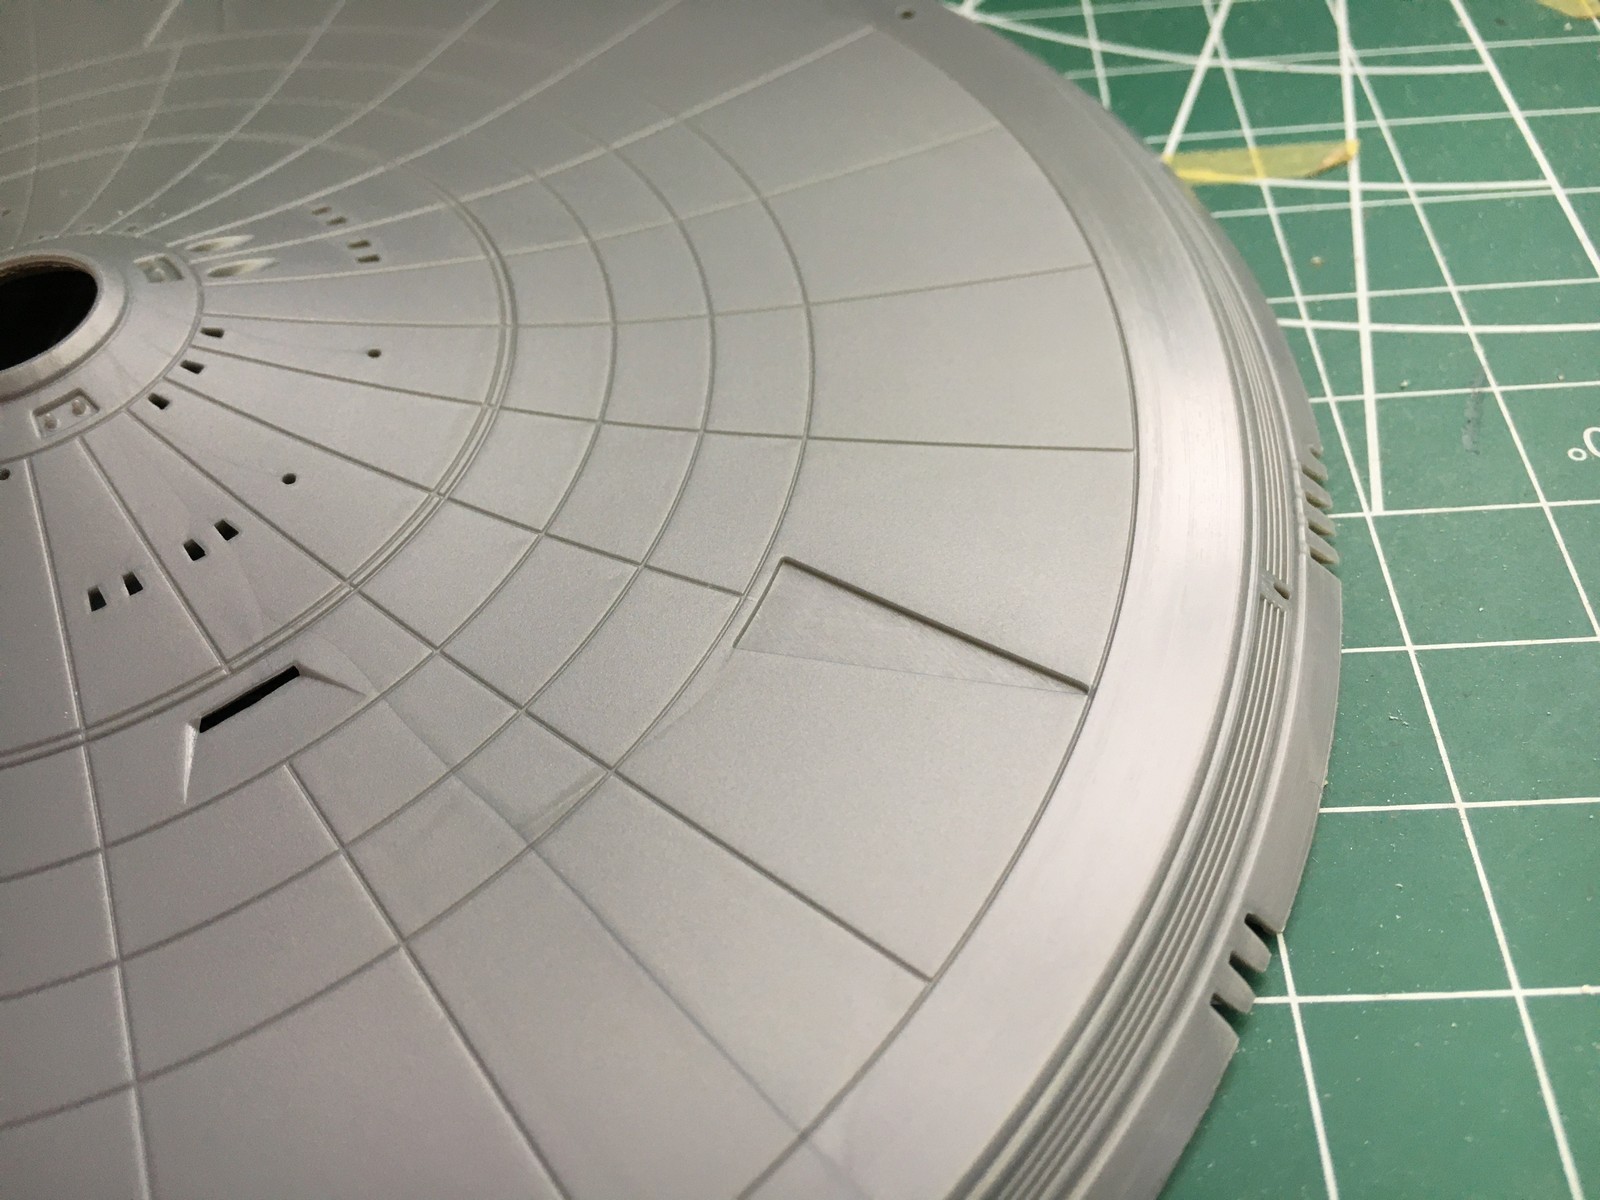
Familiar triangular detail carried over from the original–but this will be obscured if you use the aztec decals…
Round2 recommends that you cut the larger decals into smaller pieces to make them easier to work with and I HIGHLY recommend you do this, especially at the beginning of the process. After you’ve applied a half dozen or so you will get used to the process and become more adept at positioning the decals correctly and flatly. In general, the slower you go sliding the decal off the blue backing paper, the fewer bubbles and wrinkles you’ll wind up with. That said, I take my hat off to anyone who can do this entire operation and not wind up with a few wrinkles or folded over decals. Putting a final flat or semi-gloss coating over the finished product is essential and will help tie everything together and minimize any obvious mistakes, and you can also touch up problems with paint after you’ve clear coated.
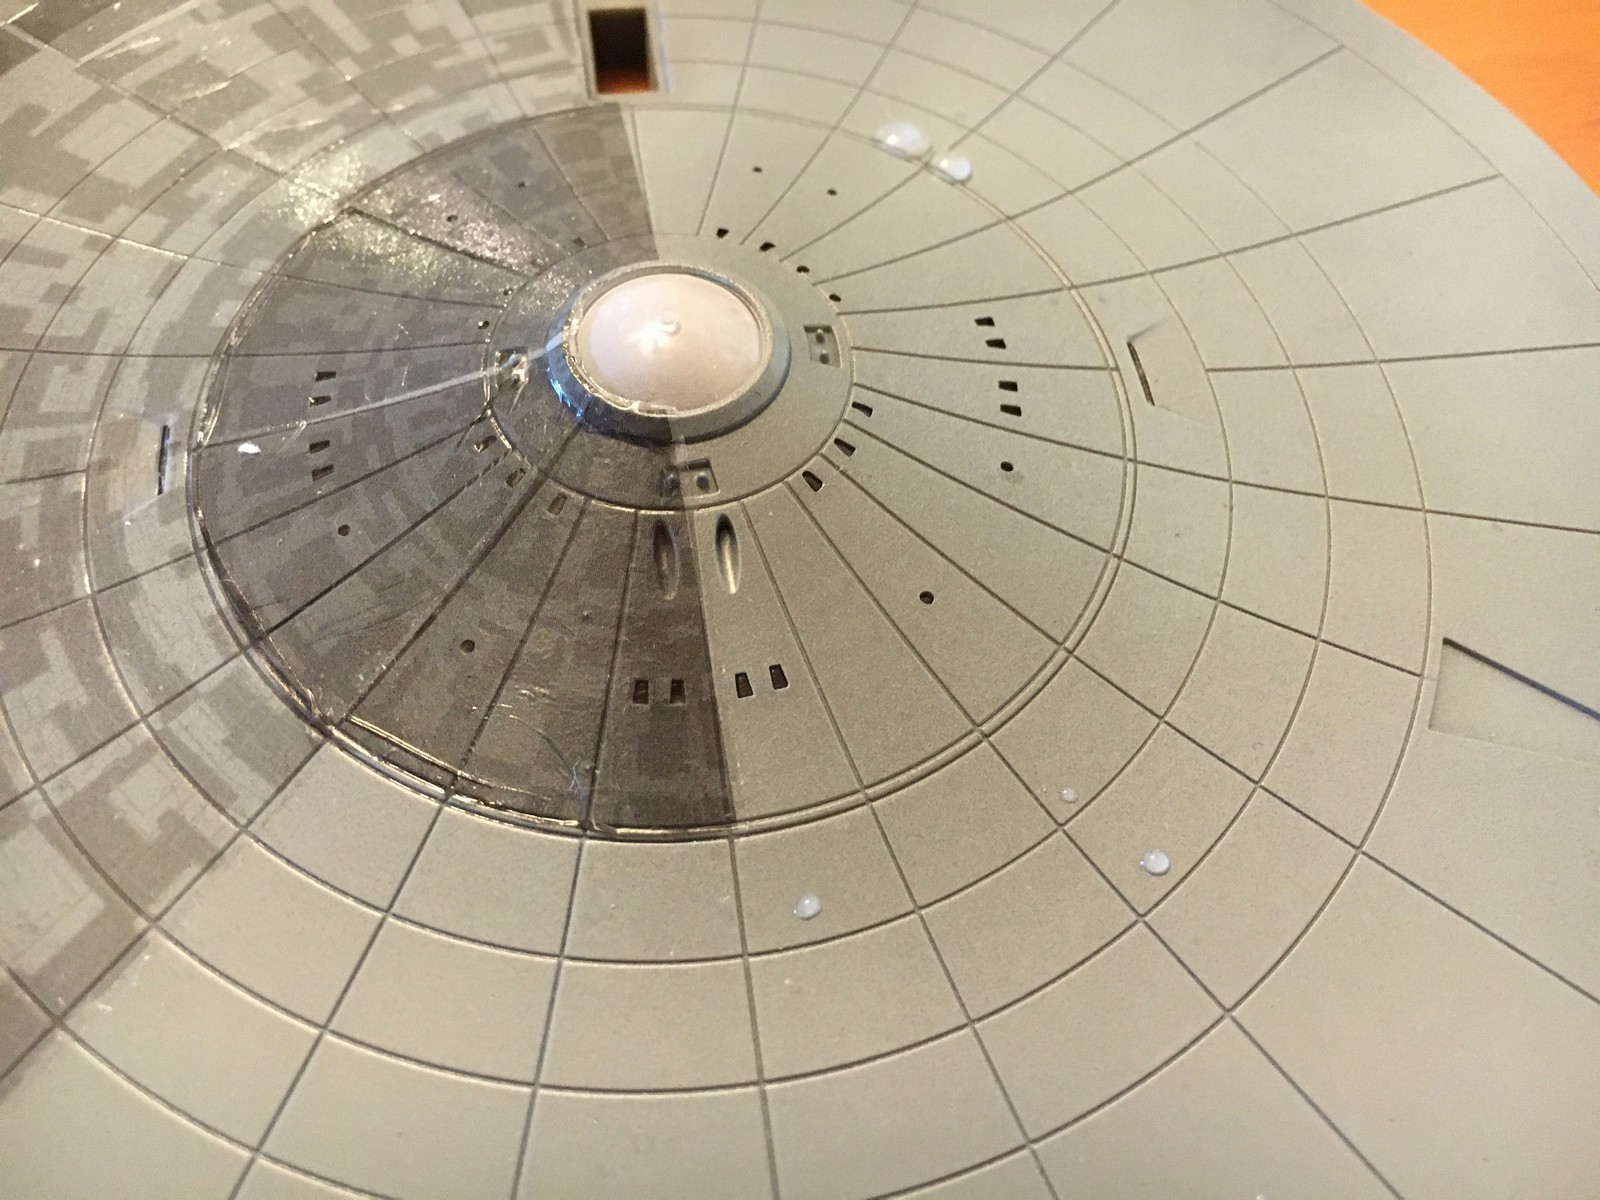
Decals sitting nicely into the hull’s details and panel lines
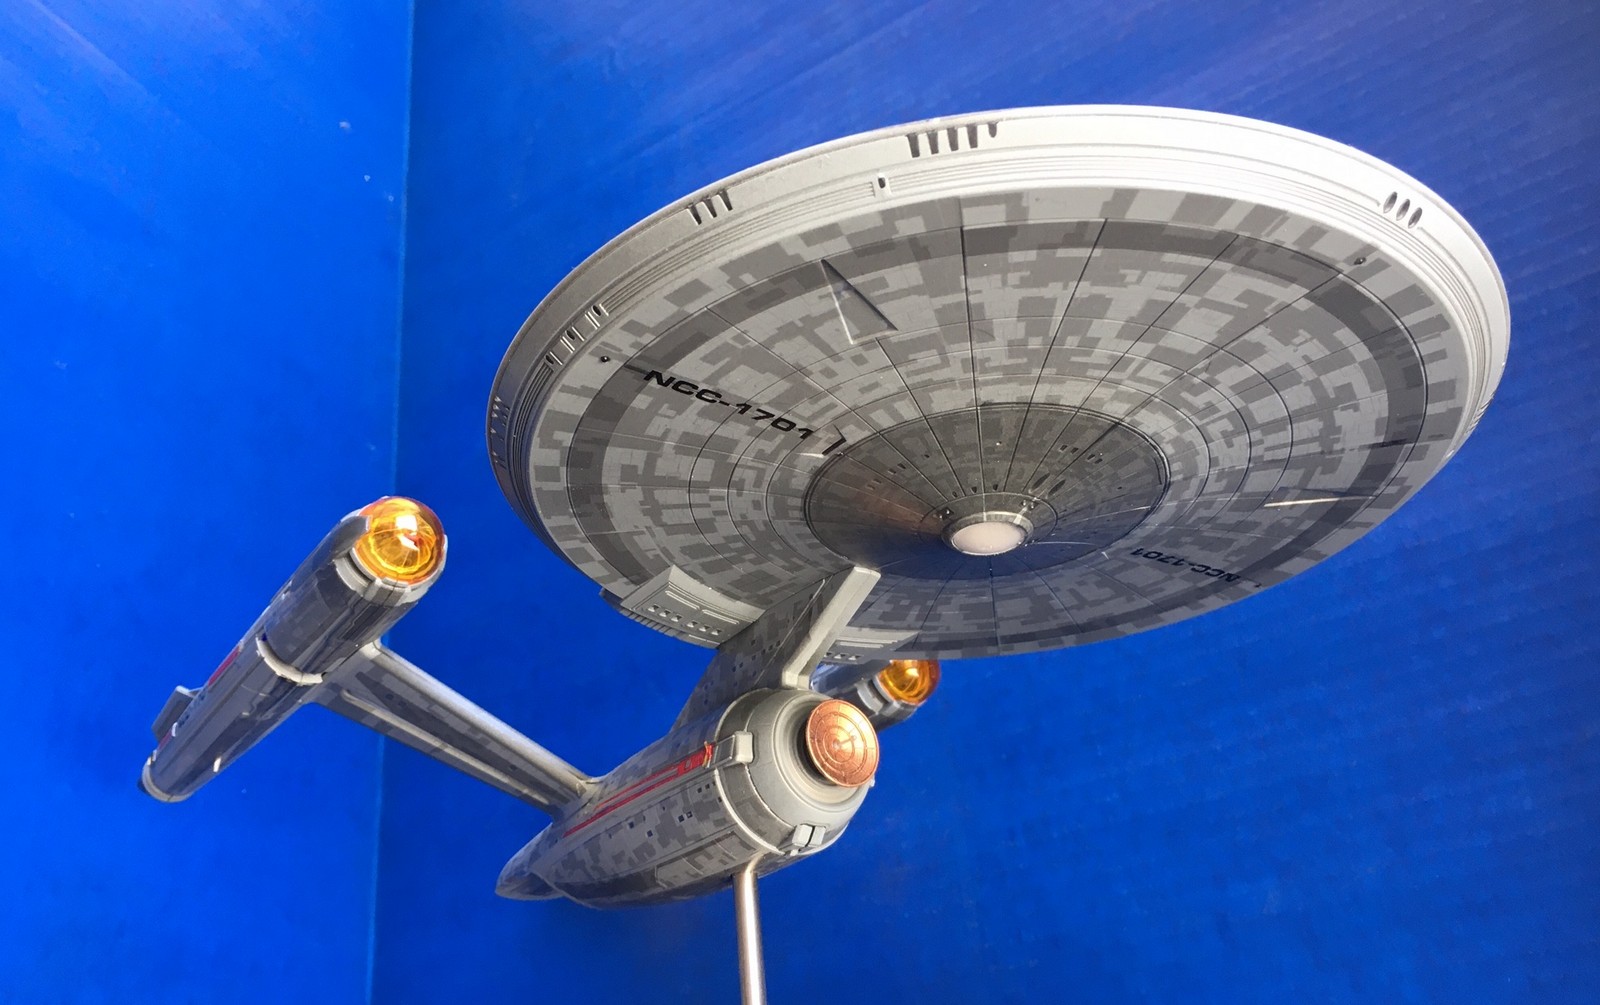
You’ll need to apply all the Aztec decals and THEN, after clear coating, apply the kit-supplied Starfleet pennants, registry number and name decals over the Aztec decals, and then apply one final clear coat. You may want to mask off the nacelle and primary hull domes and other large clear parts to keep them from getting a frosted look if you use semi-gloss or flat clear coating. The final look of the Aztec decals is impressive and probably far beyond what you’d be able to do with paint at this scale. While many of the panels are in a dark metallic gray, the decals themselves are transparent to light so you can (and will) apply them right over many of the kit’s windows but when the lights are on they will shine through the decaled areas perfectly—this also gives a better scale effect to the window areas, and in a few cases like the leading and trailing edges of the warp engine pylons, the decals will even cover up seams, eliminating the need for some sanding and filling.
Warp end caps–a challenge to paint if you’re going to light the kit
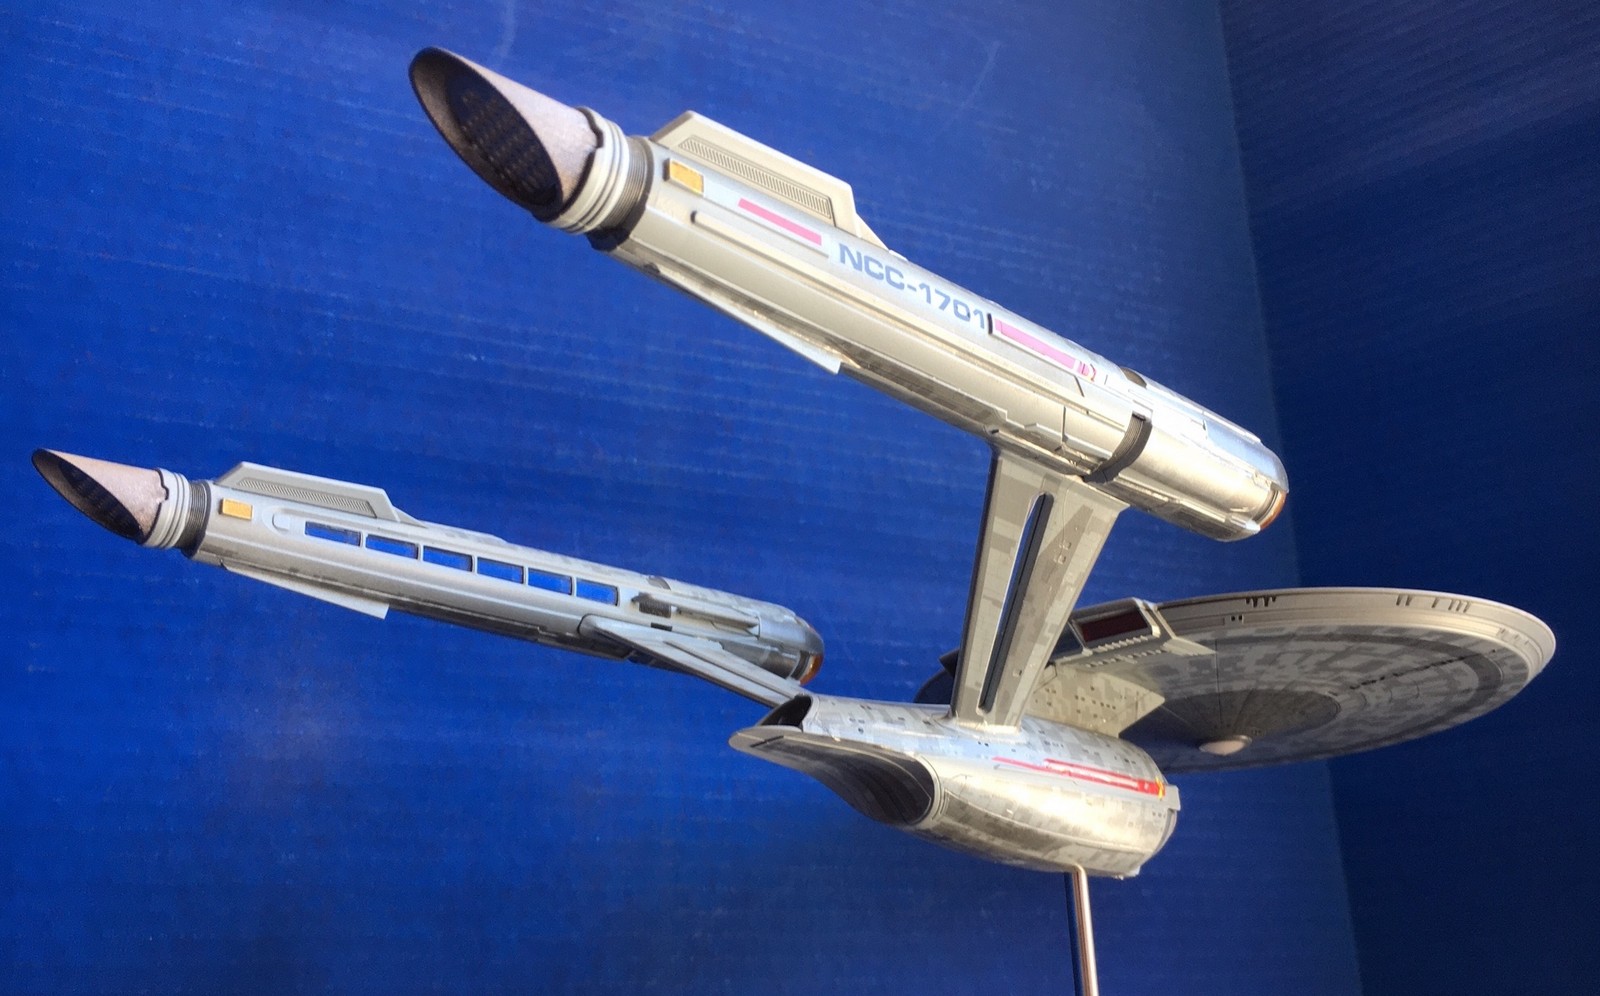
I elected to retain the kit’s clear warp nacelle domes and painted them clear orange to give them a look closer to the original Matt Jefferies Enterprise rather than the red look that has been seen on warp nacelles starting with TNG’s Enterprise D. The final look manages to conjure up the feel of the classic 1960s-era Enterprise albeit with an impressive, modern slant.
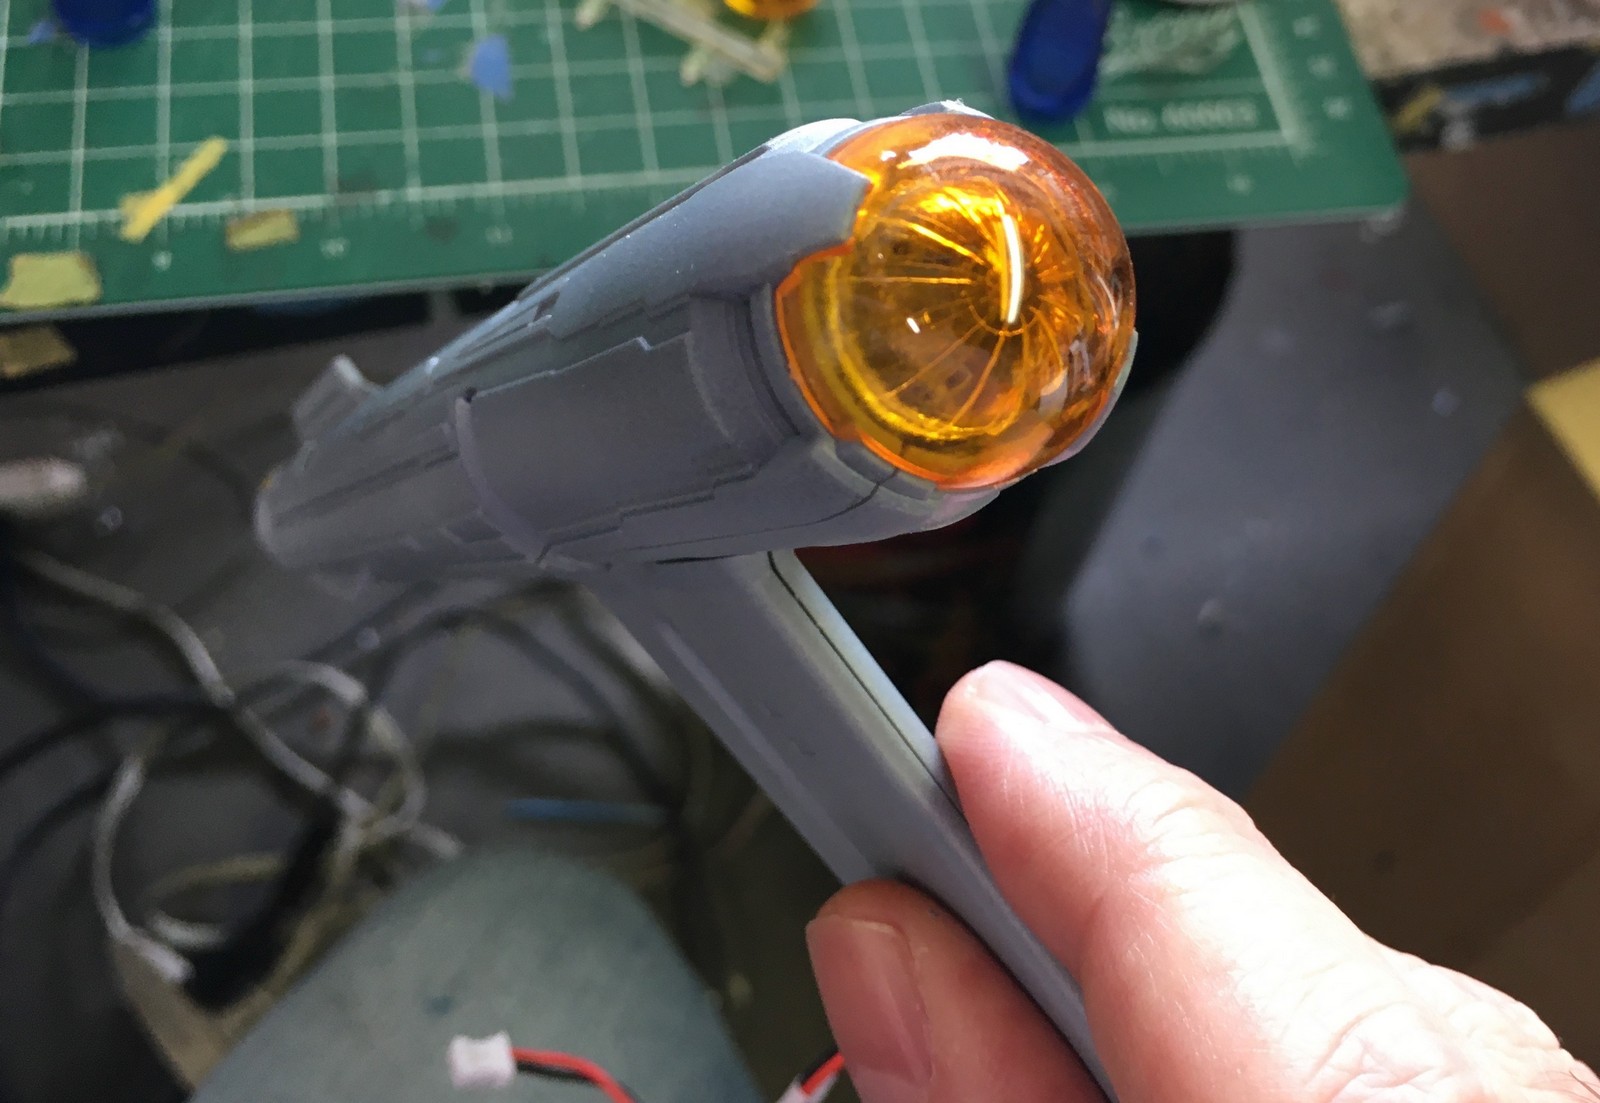
Warp engine domes painted orange, the old-fashioned way…
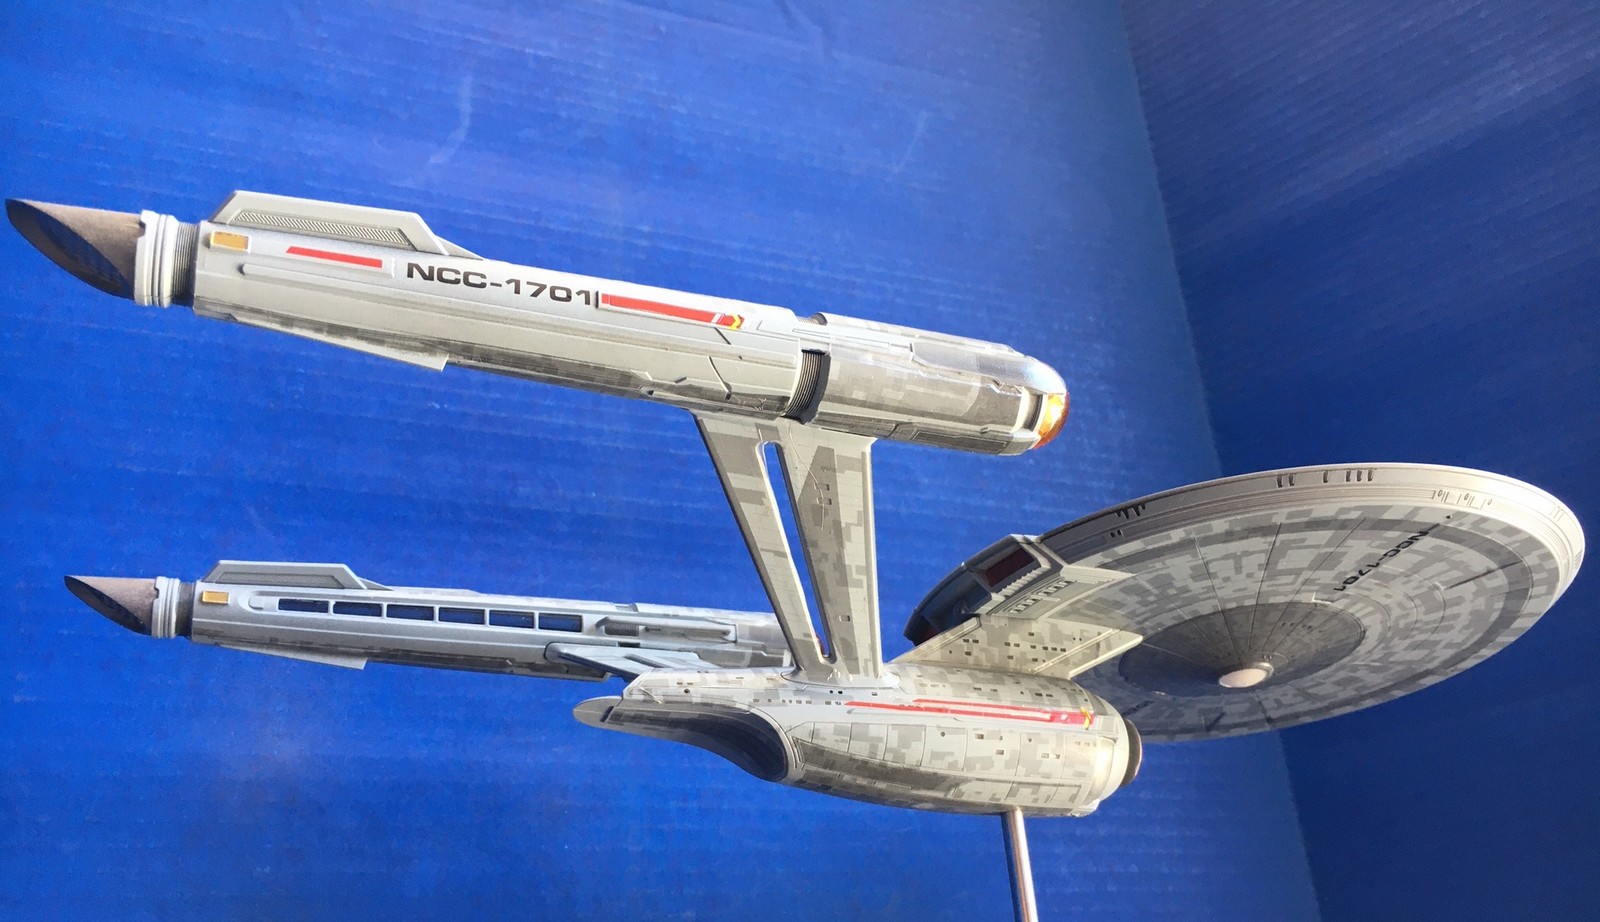
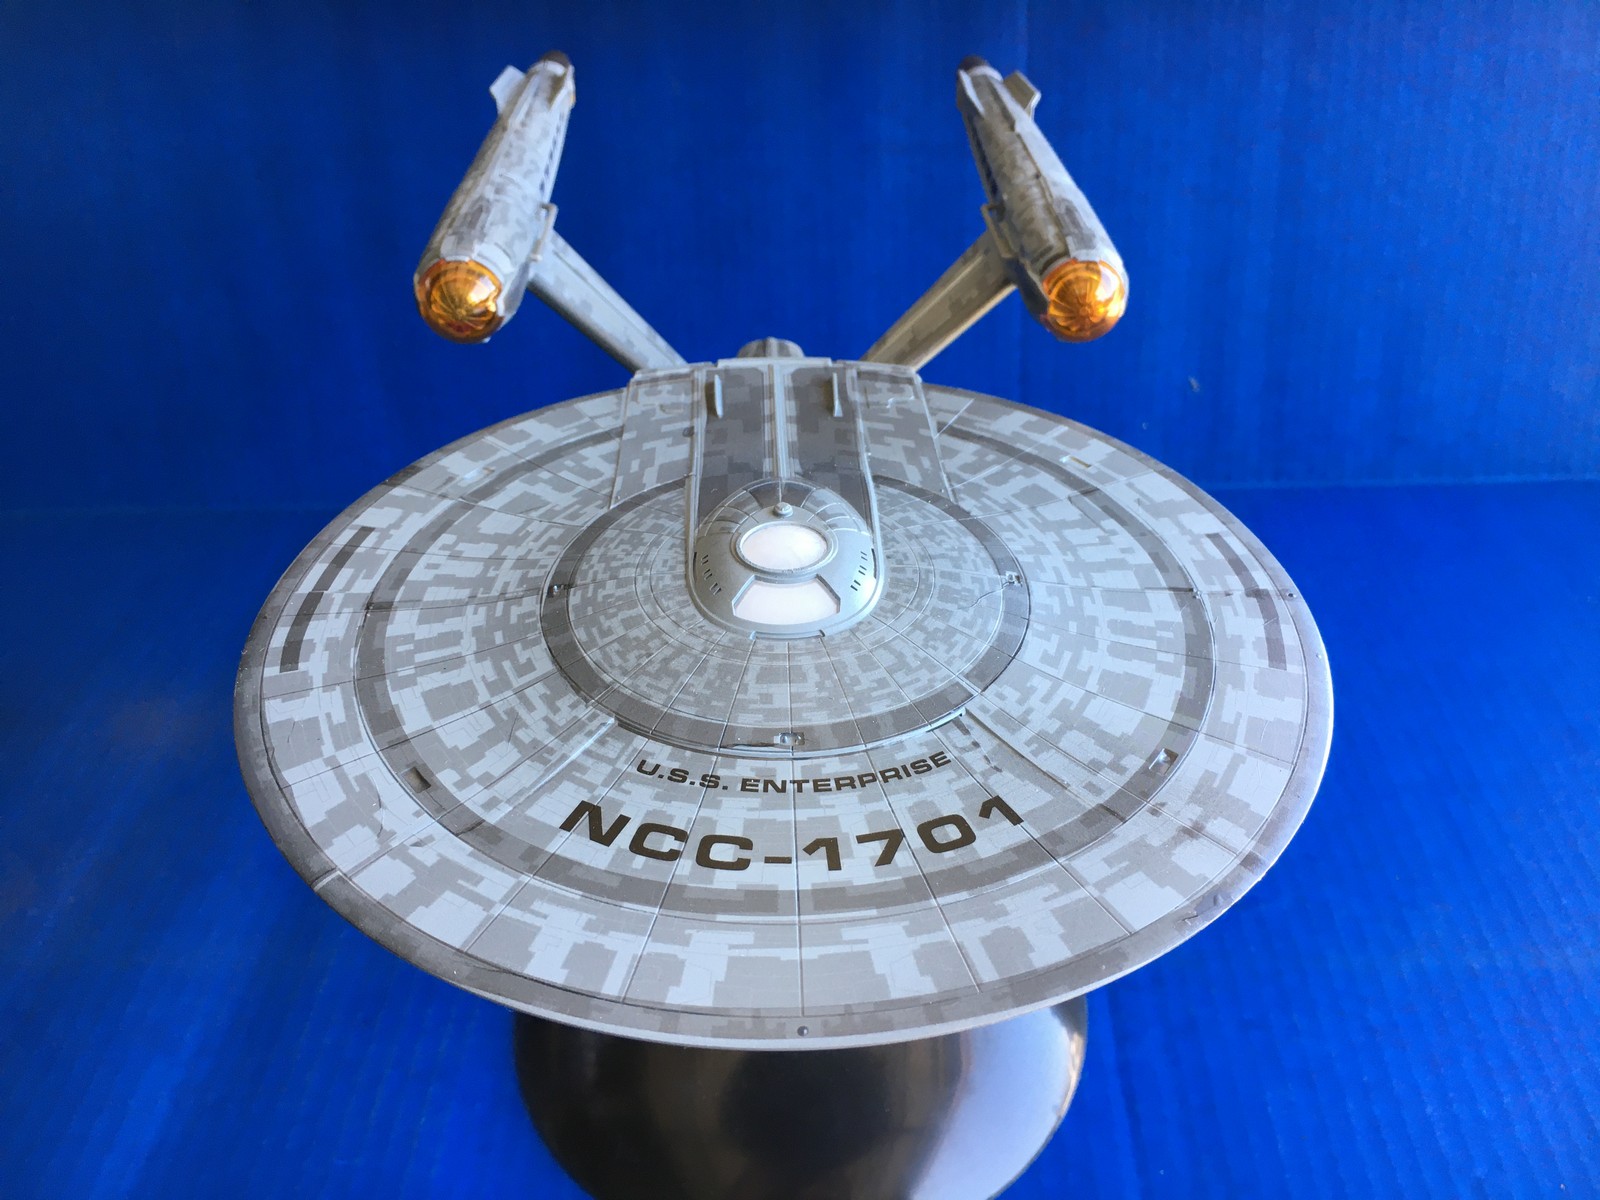
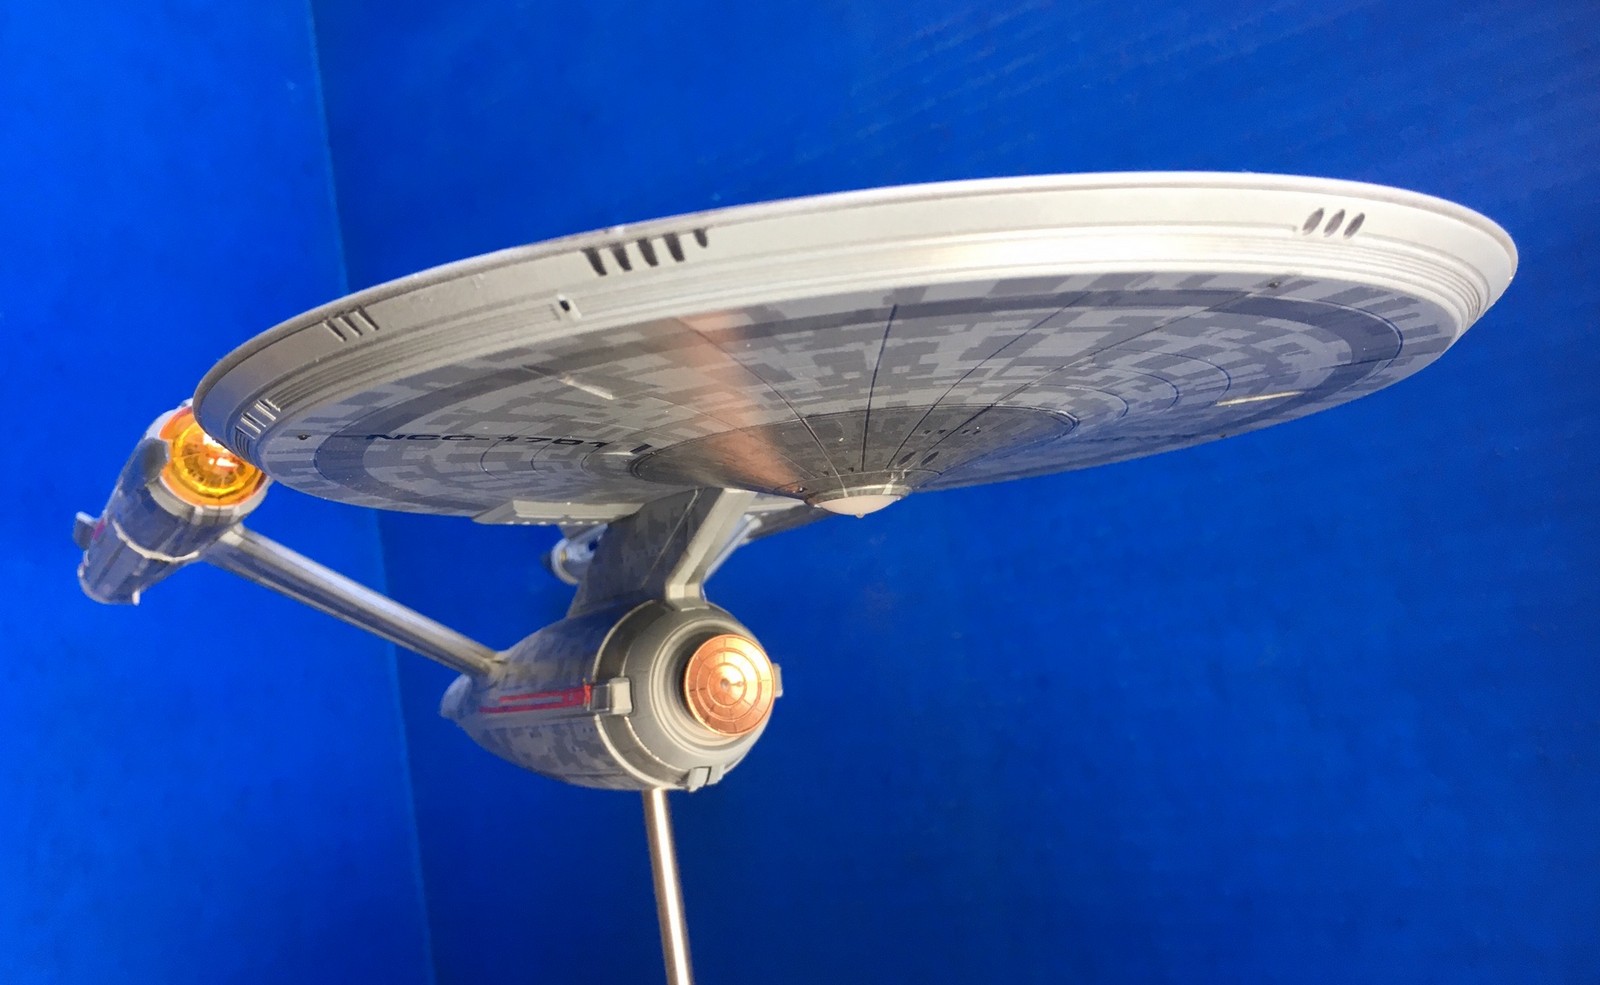
The final model
On the whole, this is a great little kit and demonstrates the scale of this newly-imagined Enterprise next to the original 1960s version, the 1979 refit, and a number of other Star Trek ships that Round2 has released in 1/1000 scale—Pike’s Enterprise is BIG. Hopefully, we’ll be seeing more ships from the Discovery series and the upcoming Pike series from the company.

Available now
Round2’s Polar Lights Star Trek Discovery U.S.S. Enterprise 1:1000 Scale Model Kit is priced at $53.99 and can be purchased at hobby shops or discounted at CultTVMan for $48.99. The lighting kit is available for $76.99 and you can also pre-order the Aztec Decal Set for $22.99.
More photos of the finished model


Jeff Bond is co-author with Gene Kozicki of the upcoming The Art and Visual Effects of Star Trek: The Motion Picture from Titan Books. You can follow Jeff on Twitter @lazymodeler.
That’s terrific. It’s everything the Kelvin Enterprise should have been, but wasn’t. I wish I had both the time and talent to build one!
I agree! I do like the Kelvin Enterprise in a fan-design kind of way, but the disco Enterprise is just perfection and so much closer to the original. As far as this model goes it looks incredible; can’t wait to get one!
Also, I’m so happy Pike is front and center on this box. Burnham may be the main character of Discovery(the show), but the Captain of the ship should always be the main person featured on the box
Yes! This should have been the ’09 Enterprise…
Same goes for the Discovery Enterprise bridge/hall way sets. They were beautiful.
Well said and 100% agreed.
Completing this properly would require the patience of a saint and the hands of a surgeon, but man, this would be the eye-catcher in any room of the house. The level of detail is fantastic.
Yes, totally, really like the details of the ship.
OMG!!! TOTALLY GETTING THIS KIT!!
My only worry is that I was never very good with paint but want the lighting kit and everything that would have to do a good job…. can you decal the whole thing that you don’t need paint?!?
Also needs a D-7 and a Romulan Bird of Prey (the plasma torpedo armed BOP) kit to face off with!!!
Agreed with this being everything the Kelvin ENT should have been (bridge set and all).
Wow, they went way overboard on the tiling — that just looks awful. Good to see that that is optional — I will be painting mine clean.
Meth,
Seriously, they ought to call it the USS DALMATION, it looks like it is a spotted starship!
No place for subtlety this century.
Kmart,
Actually, coming from Dalmatia myself, the costal region od Croatia, I wouldn’t find this idea offensive at all. :-)
But yeah, this tiling does sometimes look farfetched.
no pun or foul intended, honest!
Yeah, I’d probably be inclined to skip the aztec as well, and just highlight the existing details. Even in space, there would be some subtle weathering that might punch it up a bit more.
Weather, in space, you do realize the ship won’t fly apart in space because of speed, as Mr Scott used to say, since there’s no gravitational forces working against the ship. Since space is a vacuum, weather is non existent. And I would hope by the 25th century they’ve developed fade free starship paint.
Paint fading from exposure to sunlight and various radiation as well as micrometeroid hits would be a given, unless you have smart or organic paint that respreads itself.
Nice. Beautiful Enterprise Model. It was an exciting moment when the ship showed up in Discovery. The TOS music theme, the sound of the engines, and the close up, was my favorite moment from Season 1. If they sell the Discovery model, it has to include the origami bridge.
My god, little to no drilling for the windows – BIG thumbs up! (I HAVE to light my models, it’s a disease :/). …must resist urge to purchase right away…
This should have been the Kelvin Enterprise.
Has anyone ever said what the lower saucer triangles are? Landing gear?
They were described as such for the movie-era ship, although there they were a bit more trapezoidal. It might have been in Mr. Scott’s Guide to the Enterprise, I’m not sure. The idea was that the saucer could detach and land, only in an emergency and then not be recoverable.
I believe the Galaxy-class had them as well, again the saucer being described as unrecoverable even if it successfully lands. (Pressures of gravity or something- pre-2009 the ships were built in space. :-) ) I don’t think they had time to deploy them in Generations.
Voyager of course had them but was meant to land.
Andy Probert worked on the refit and the -D, and yeah he had them as landing gear.
I’ve always had issues with the idea of the saucer detaching at all. I always liked the idea of a escape pods, because I believe that’s what they would have, life boats….not a crashing saucer.
There were “blueprints” published in the late 60s (forget the exact year) that had plenty of cross-sections printed on them, and one of the things that caught me by surprise was landing gear and boarding ramps in the saucer. The Original Series never got the chance to do anything with it (budgetary restraints and all that), but the idea stuck around for TNG. The tabletop game Star Fleet Battles took the idea and ran with it, as well. The idea was it was meant as an escape ship, in case the warp drive breached. Unlike the TNG era, once the saucer was detached there was no going back, as the dorsal literally blasted apart during separation. The saucer was then used as a lifeboat. Apparently the Klingons had the same idea, with the boom being able to blast away from the rear of the ship in order to save the command crew during a catastrophe.
Alex, John Ford built on that (and on stuff in the original STAR TREK CHRONOLOGY pubished at the time of TMP’s release) for his staggeringly fantastic THE FINAL REFLECTION, which has the boom separation thing happening as a seemingly standard terminal escape maneuver.
I won’t be buying one.
Of course YOU won’t. You think flight is impossible. ;-)
paper airplane …
Hey, you gotta start somewhere.
I meant, he’s Dr. Zaius, the guy who crunches up Taylor’s paper airplane in the original APES movie.
Yeah, I know. I always thought his crushing the paper airplane was a chilling moment. Oh that Zaius.
There are some model-building YouTube channels that often focus on Star Trek models. My favorites that really go into detail are:
Aztek Dummy (https://www.youtube.com/channel/UCiiEox7-YK3zFuWZ3Nxi2Mw) – Lou will be doing a series of videos on this model starting Friday night.
Trekworks (https://www.youtube.com/channel/UCy_Kubq52WiDeYVzz1VMR2A) – Boyd likes to put his own custom light and sound effects into his models and has been working on this kit over the past week; he already has a few videos up showing his progress.
I’d recommend checking them out to see the amazing stuff some talented people can get out of these kits.
Trekworks is now complete minus the Aztek decals and a custom base he is building. He did great job with his custom lighting. He absolutely knows how to finish a model.
If I have one generic nit to pick – and I direct this towards the makers of any and all lighted models of similar construct, not specifically this iteration of the Big E – it’s that it seems to be such a missed opportunity to more permanently light a model internally without resorting to a battery pack with a simple on/off switch. Think of, say, the power requirements of a pet’s water fountain – it comes with a two-piece, unpluggable DC power supply to facilitate cleaning the bowl and pump. The same goes for all of the LED misting bowls and fountains some people have in their homes for ambiance and/or humidifying. Provide these models with a 6′ cord and an inline on/off switch, and there you go. No batteries to replace, and you retain the same control of when you wish to run the light kit. The increase in price is negligible considering the overall cost in building something of this quality.
Yeah, that would be great. I would say, go with a standard DC connector like that used for guitar pedal power supplies, 2.1mm barrel center-negative. Usually used for carrying between 9 and 18V with varying amperage. Low-voltage LEDs might even be internally wireable using print-on conductive paint – if there isn’t any risk of heating up etc.
It is breathtaking, thank you Jeff! Great job, I love articles like these. The Disco design really grew on me quick, and I wish I could see it with “right angle” nacelles, but I love the orange caps! I disagree though that this should’ve been the Kelvin Enterprise – I really like the “hot rod” retro-future Enterprise those movies gave us, which worked for the general face lift and tone the whole Kelvin series was for Star Trek. Discovery is more akin to “classic” Star Trek, and deserved a classic Enterprise to fit its modern aesthetic.
Yeah it looks vividly beautiful.
Nice
Is there an in-universe reason for all this “aztecing”?
Not that I could find but it’s probably just a tougher hull material in-universe. Or just a switch up in aesthetics. I’m pretty sure IRL militaries do this from time to time. Just look at the Zumwalt-class destroyer!
I recall some chatter about deflector plating. It’s sci-fi, so anything that’s made up is plausible.
Looks cool!
I love this design – it looks like a blend of the original and movie versions. The aztec decals always look too strong to me though. I used them on my 1/350 movie Enterprise kit then toned them down with a coat of thinned white.
I’m saving up my extra cash to get this kit, along with the lighting kit. Looks like a cool build. I will not try the Aztec decals. I don’t have the finger dexterity, or the patience for that, and I really don’t like the way it looks and covers detail up. I am 67 and build basic models now with some photo etch here and there.
This is a magnificent redesign, and the kit looks amazing. Much more evocative of Jefferies’ original vision than the Kelvin look (though that one grew *very* slowly on me.)
Yikes! That sleek sexy lady…who would always bring you home, sure got ugly! Nicely engineered kit, but not a fan.
Excellent job. As a fellow model builder, obsessed with detailing- I can appreciate the time, talent and patience it took to create this. Unfortunately, due to lack of space- I’ll have to pass on this beauty and stick with the smaller version issued a few months back. Very detailed- but under a foot long- it looks great – and comes with decals at no extra cost.
Yeah, if only my modeling, painting and decalling (is that a word?) skills were remotely up to the task, I would jump on this kit in a heartbeat.
I am suddenly suffering from Modeler-Envy.
Hey, Mr. Bond, are there any new interviews in the upcoming book? Or is it mainly just getting as much as the available art together in the same physical space, like a caption volume? One of the reasons I ask is that having interviewed several TMP VFX alum in the last year — it’s kind of a career-long hobby, up to nearly three dozen now — not one of them said he had been contacted about the book … yet there are certainly still tales to be told outside of or expanding upon what has been covered in RtT and other accounts. (I’m not on social media, hence my question here rather than via twitter or facebook or what-have you.)
Great build Mr Bond. I see what you mean about some of the inaccuracies but they’re minor. And the screen version has little details that change or appear/disappear from shot to shot. Ahh CGI…
Got mine with the light kit, and just having fun testing different colors on the nacelle caps. Hopefully it’ll look half as good as yours.
I want this so bad. But I think I’ll not do the Aztec stickers. Looks amazing
While I like the idea of a Capt Pike series, this Enterprise is truly at the ugly duckling stage before she turns into the beautiful lady we see in TOS.
Haven’t seen a good looking Enterprise yet this century, except in reruns from the 20th.
I miss the bevel Under the primary hull. Yes, it costs living space, but it’s part of the E’s surprising curves that make her so damn sexy!